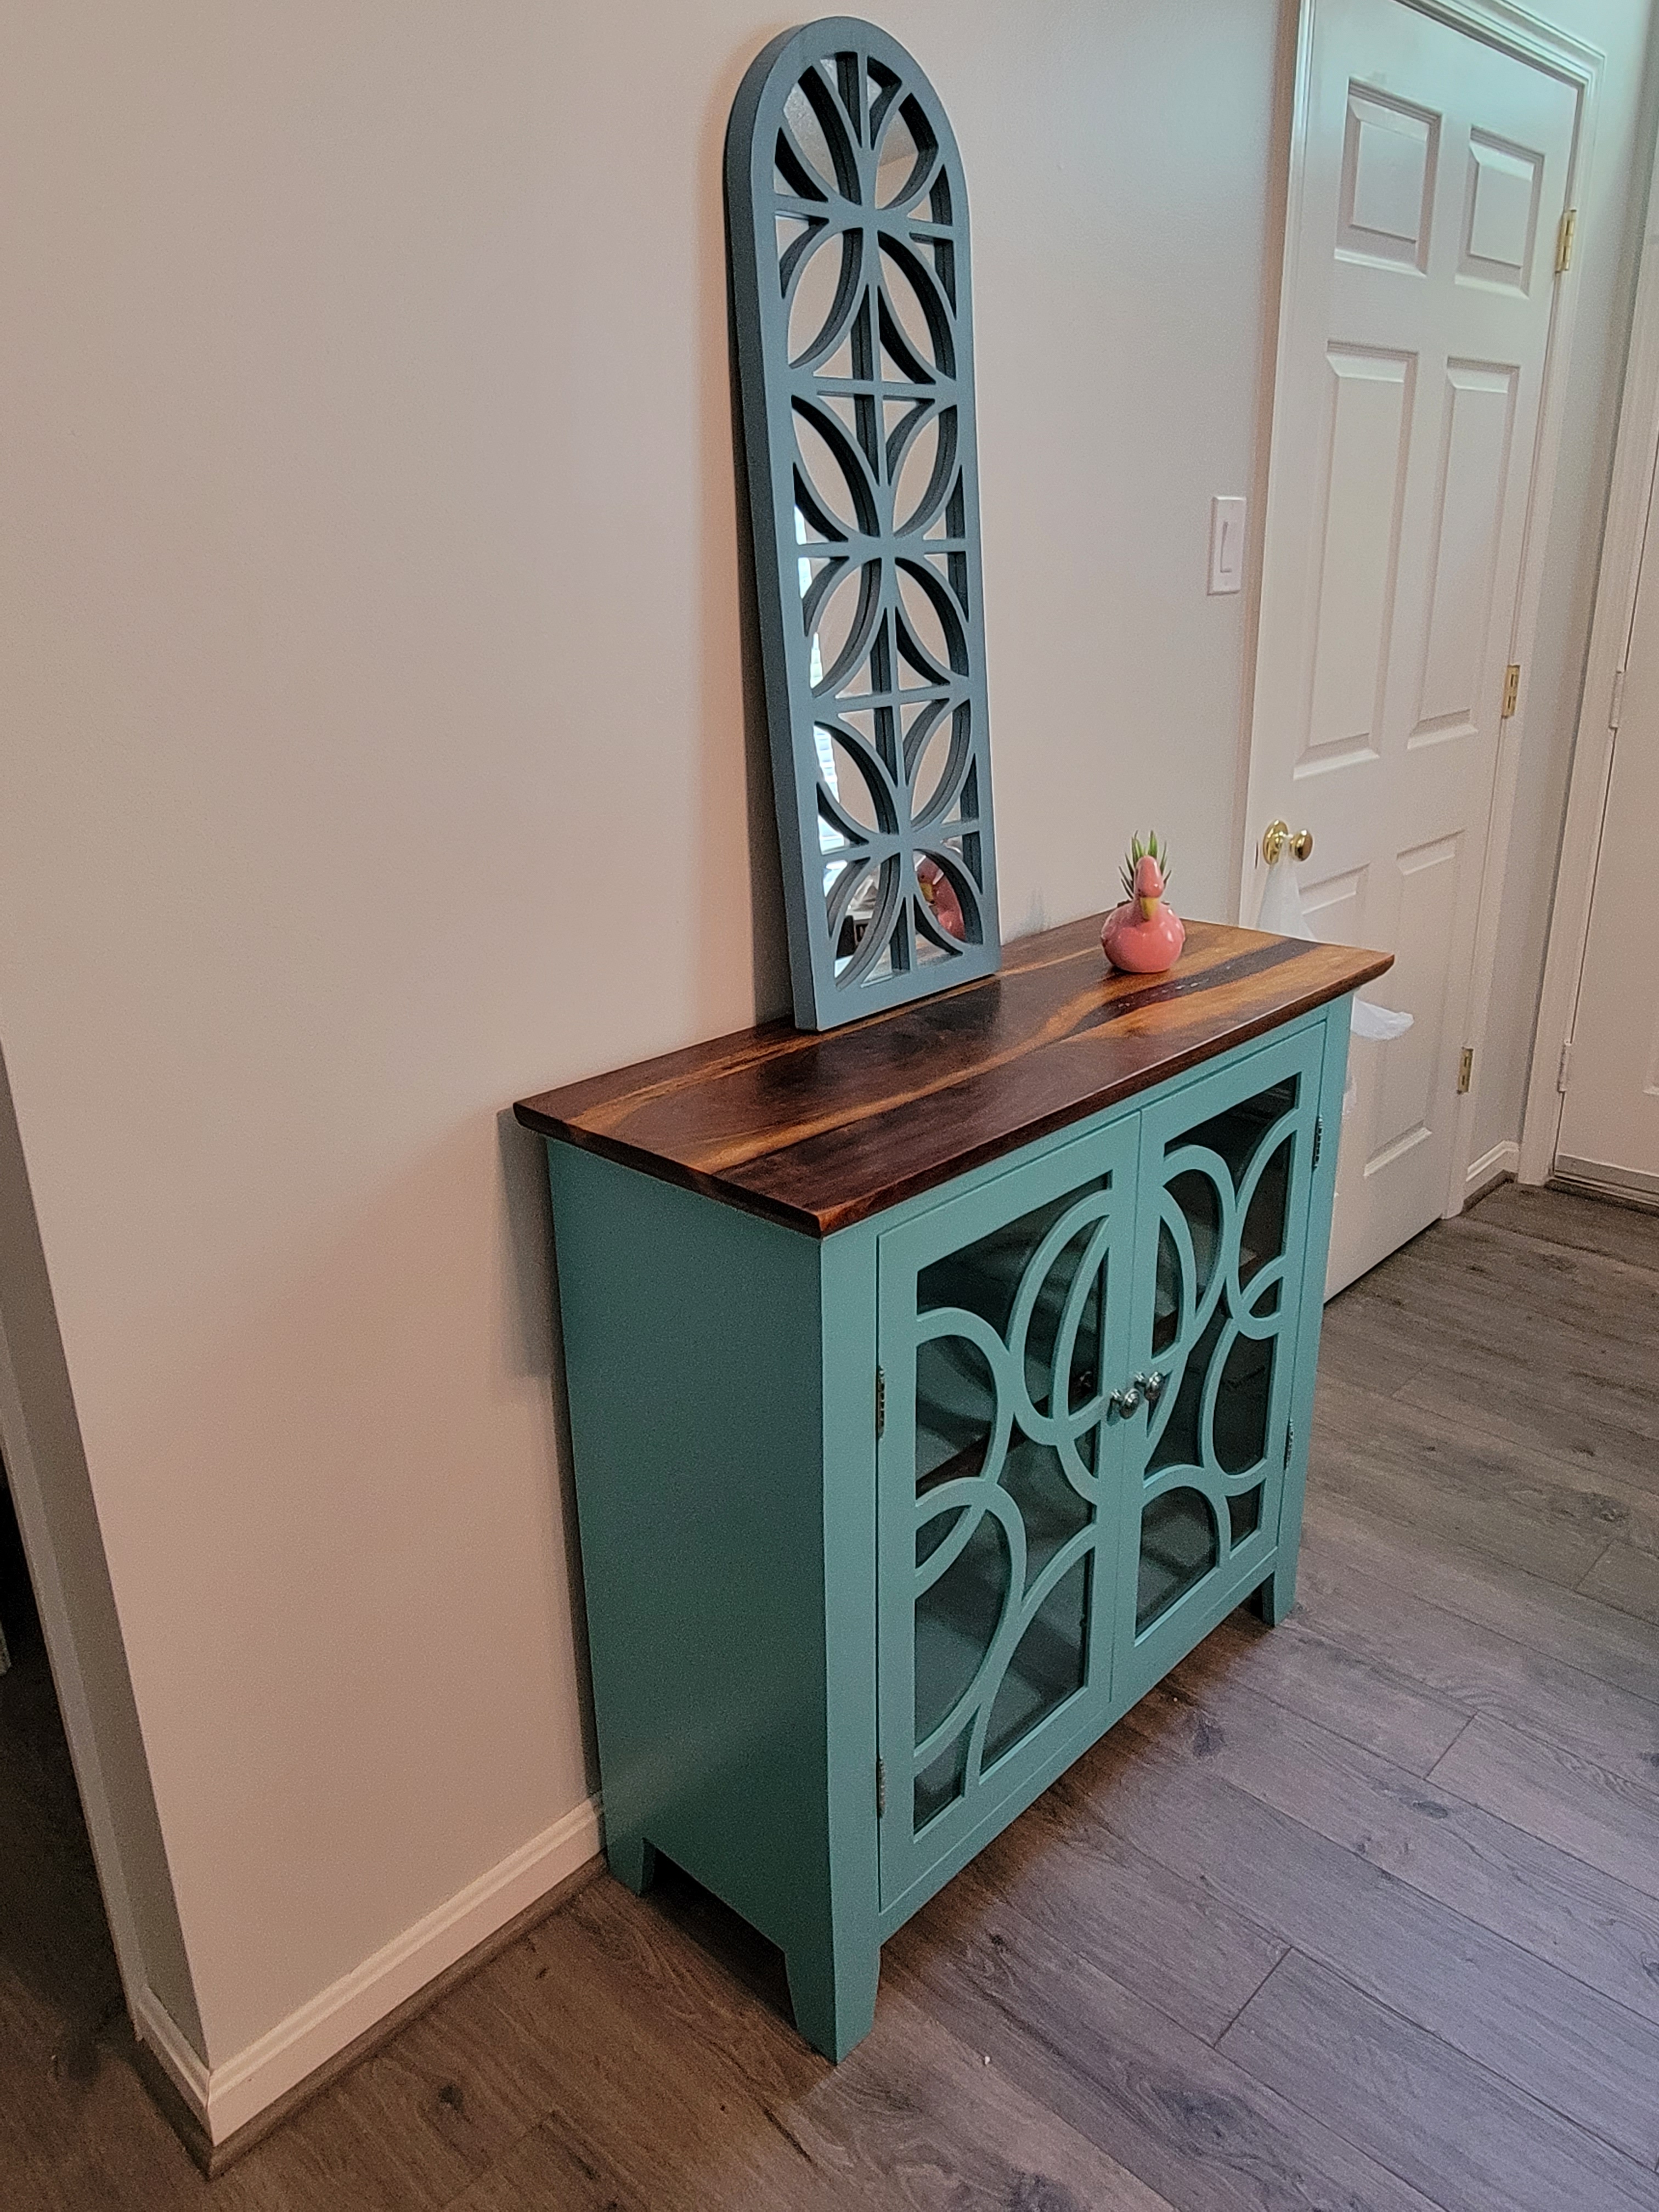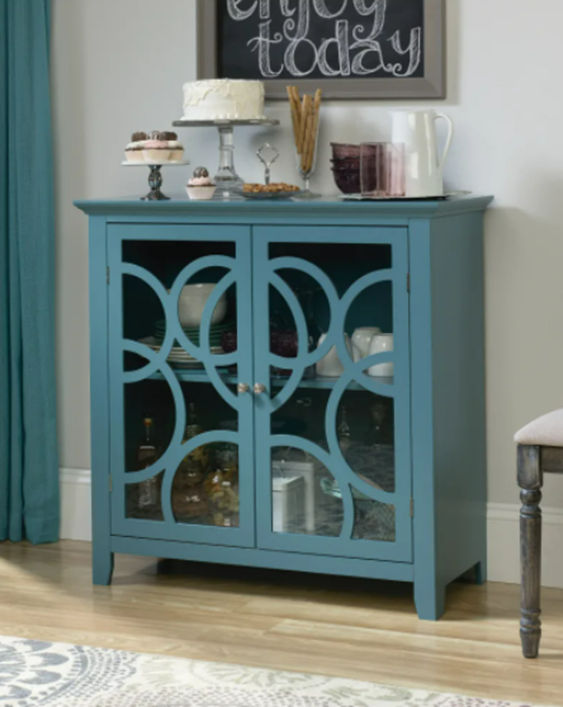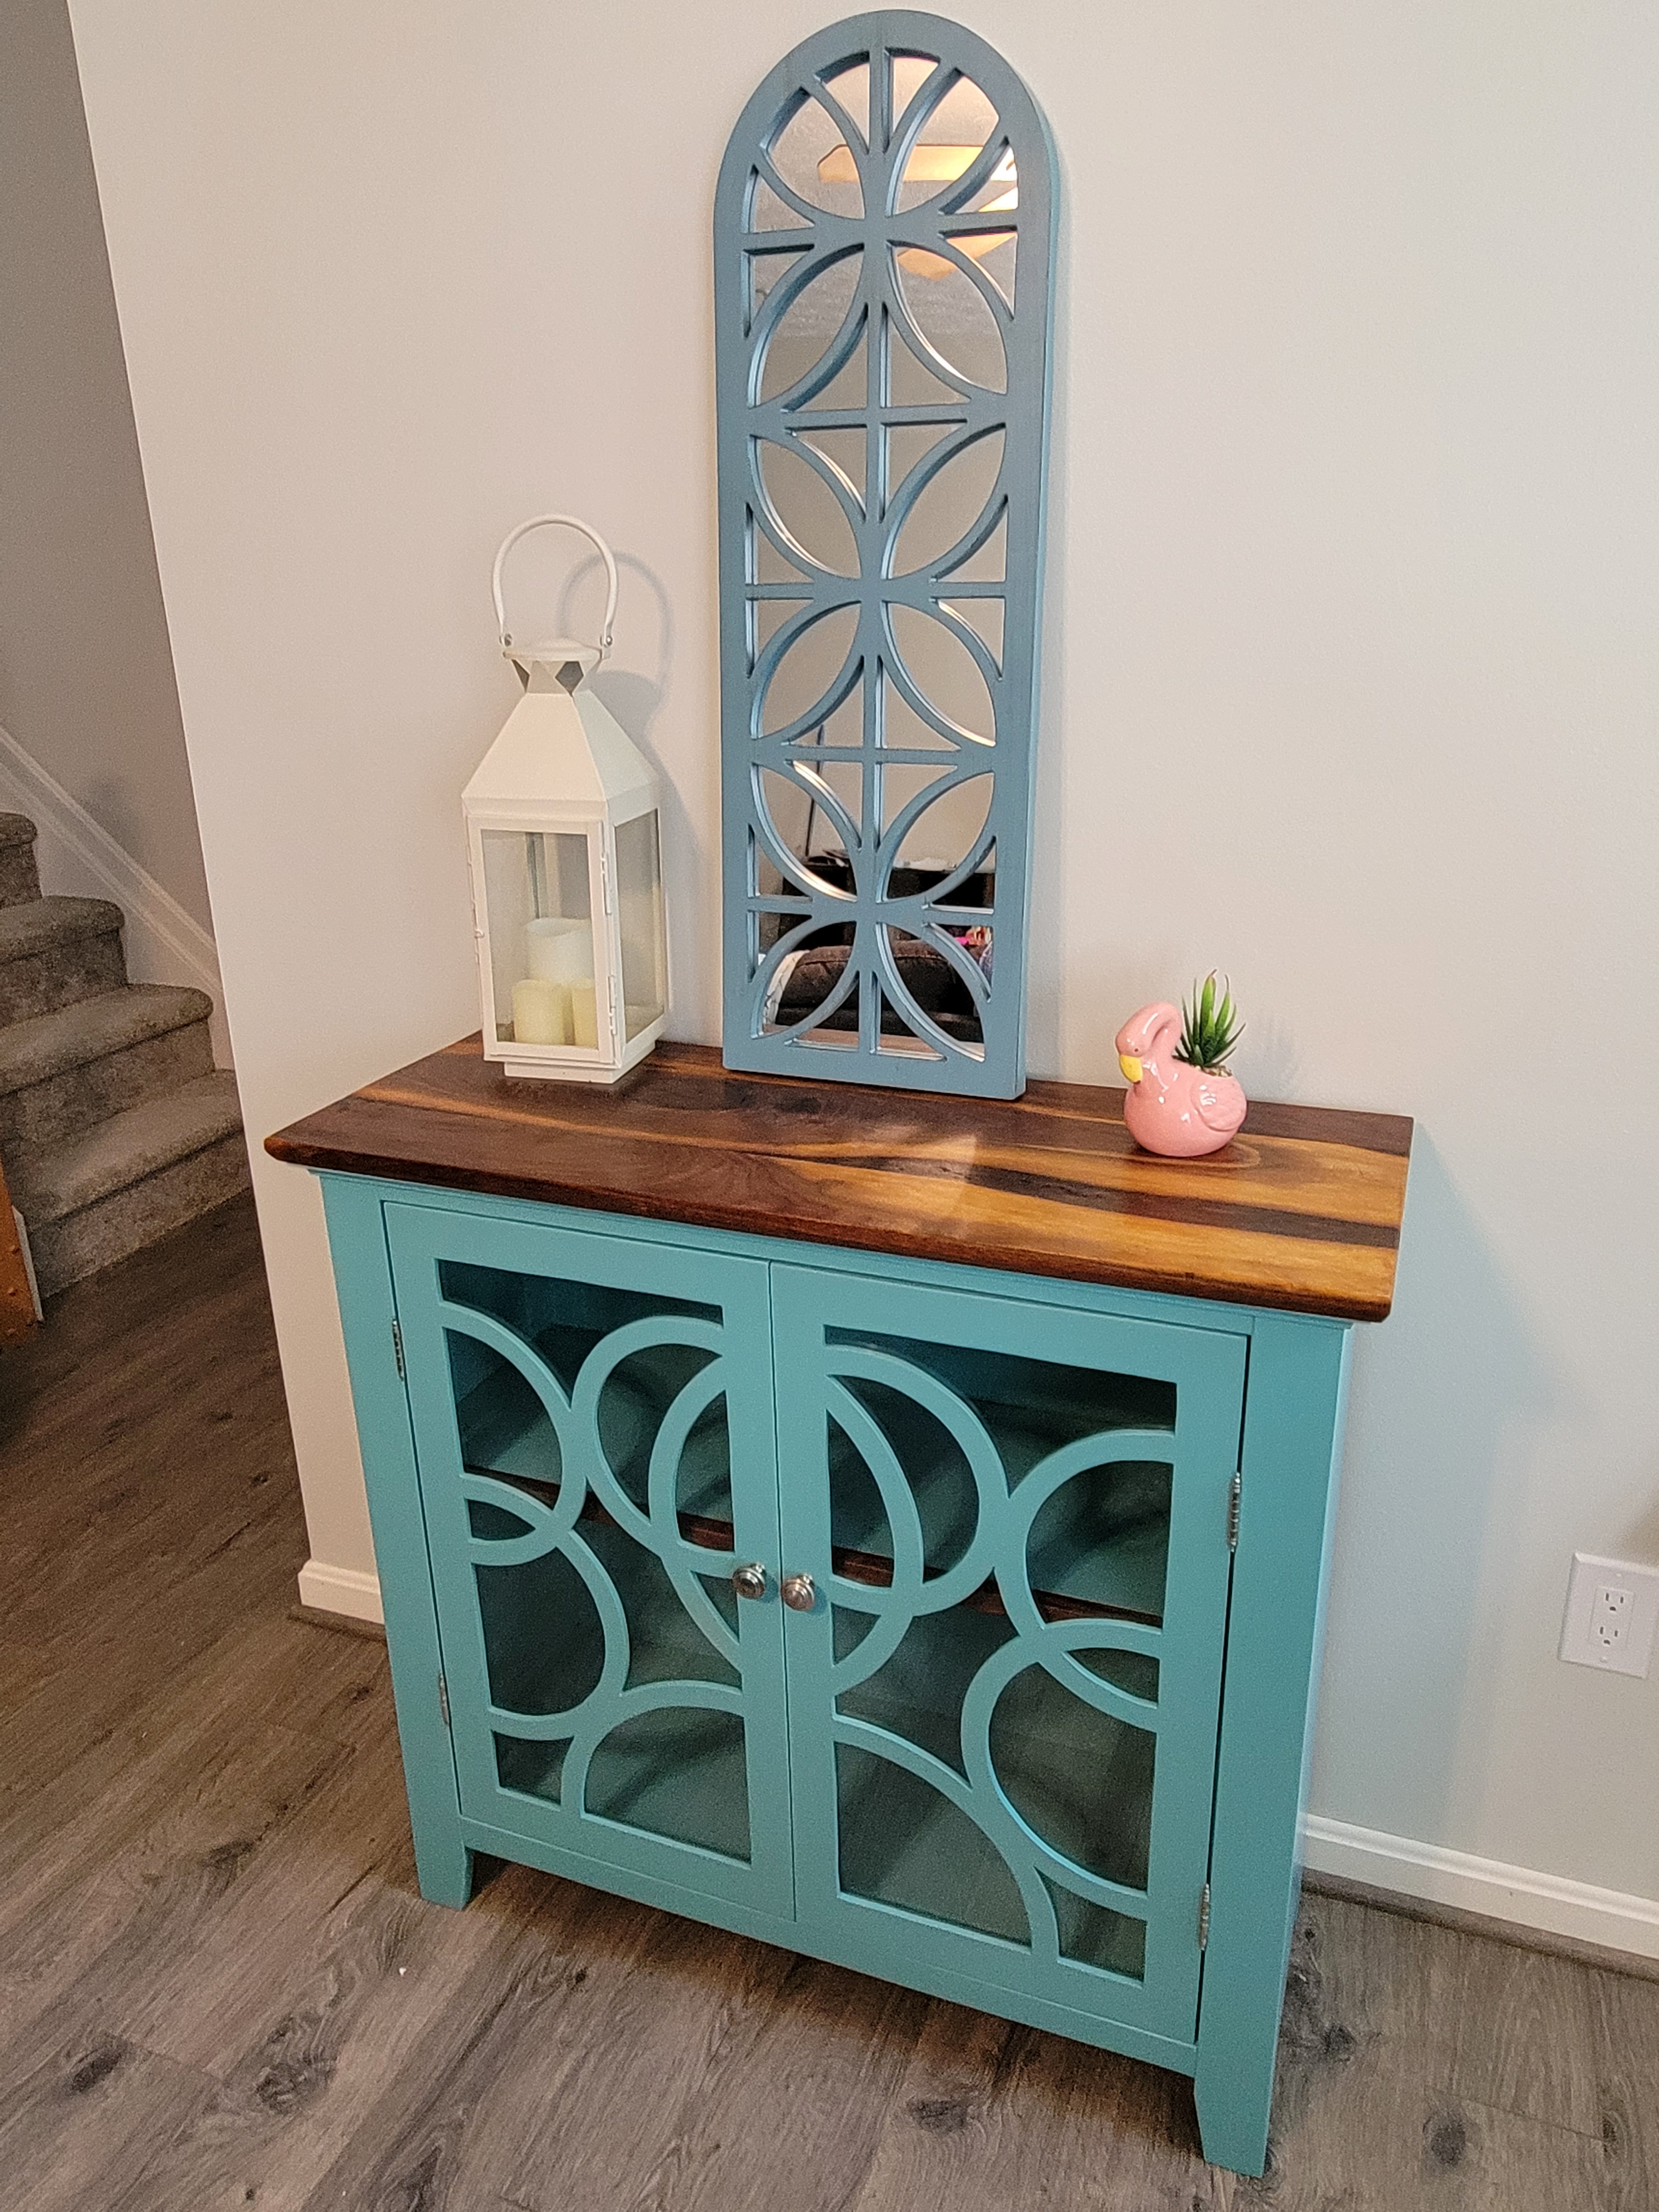
When my daughter was looking for a new cabinet, she found one made by Sauder (Ready to Assemble) Furniture. This cabinet is not something that I’d normally go for, but she liked it. It wasn’t even that expensive, but she skipped over it in favor of some more necessary furnishings. But fast-forward a little bit, and I found myself with a couple of walnut boards that had some bark left on them. What to put them on, I wondered. Well, what about that cabinet with a “live-edge” top? So I found a photo of the Sauder cabinet online and then set about making my own interpretation of it, and that’s what you have here.
Apart from the top, this is all MDF. There’s a half sheet of three-quarter-inch that built the whole case. The doors are quarter-inch with an additional half-inch that makes up the frame. The doors are a bit unconventional, construction-wise, but this seems to be the most effective way to mimic the Sauder doors, and it worked great. The case of this cabinet is nothing spectacular. Standard case construction, a dado for the bottom shelf, drilled holes for shelf pins, and a little glue. No mechanical fasteners needed.
The one twist on the cabinet is the front corners. I mitered the side to the front and used biscuits to join them. Once these were glued up and dry, they were rock solid. Plus, since the cabinet was to be painted, this gave me a real nice joint that looks great once painted. Cut out the sides to give it legs, a thin strip top and bottom, and the cabinet is done. Now for those doors…
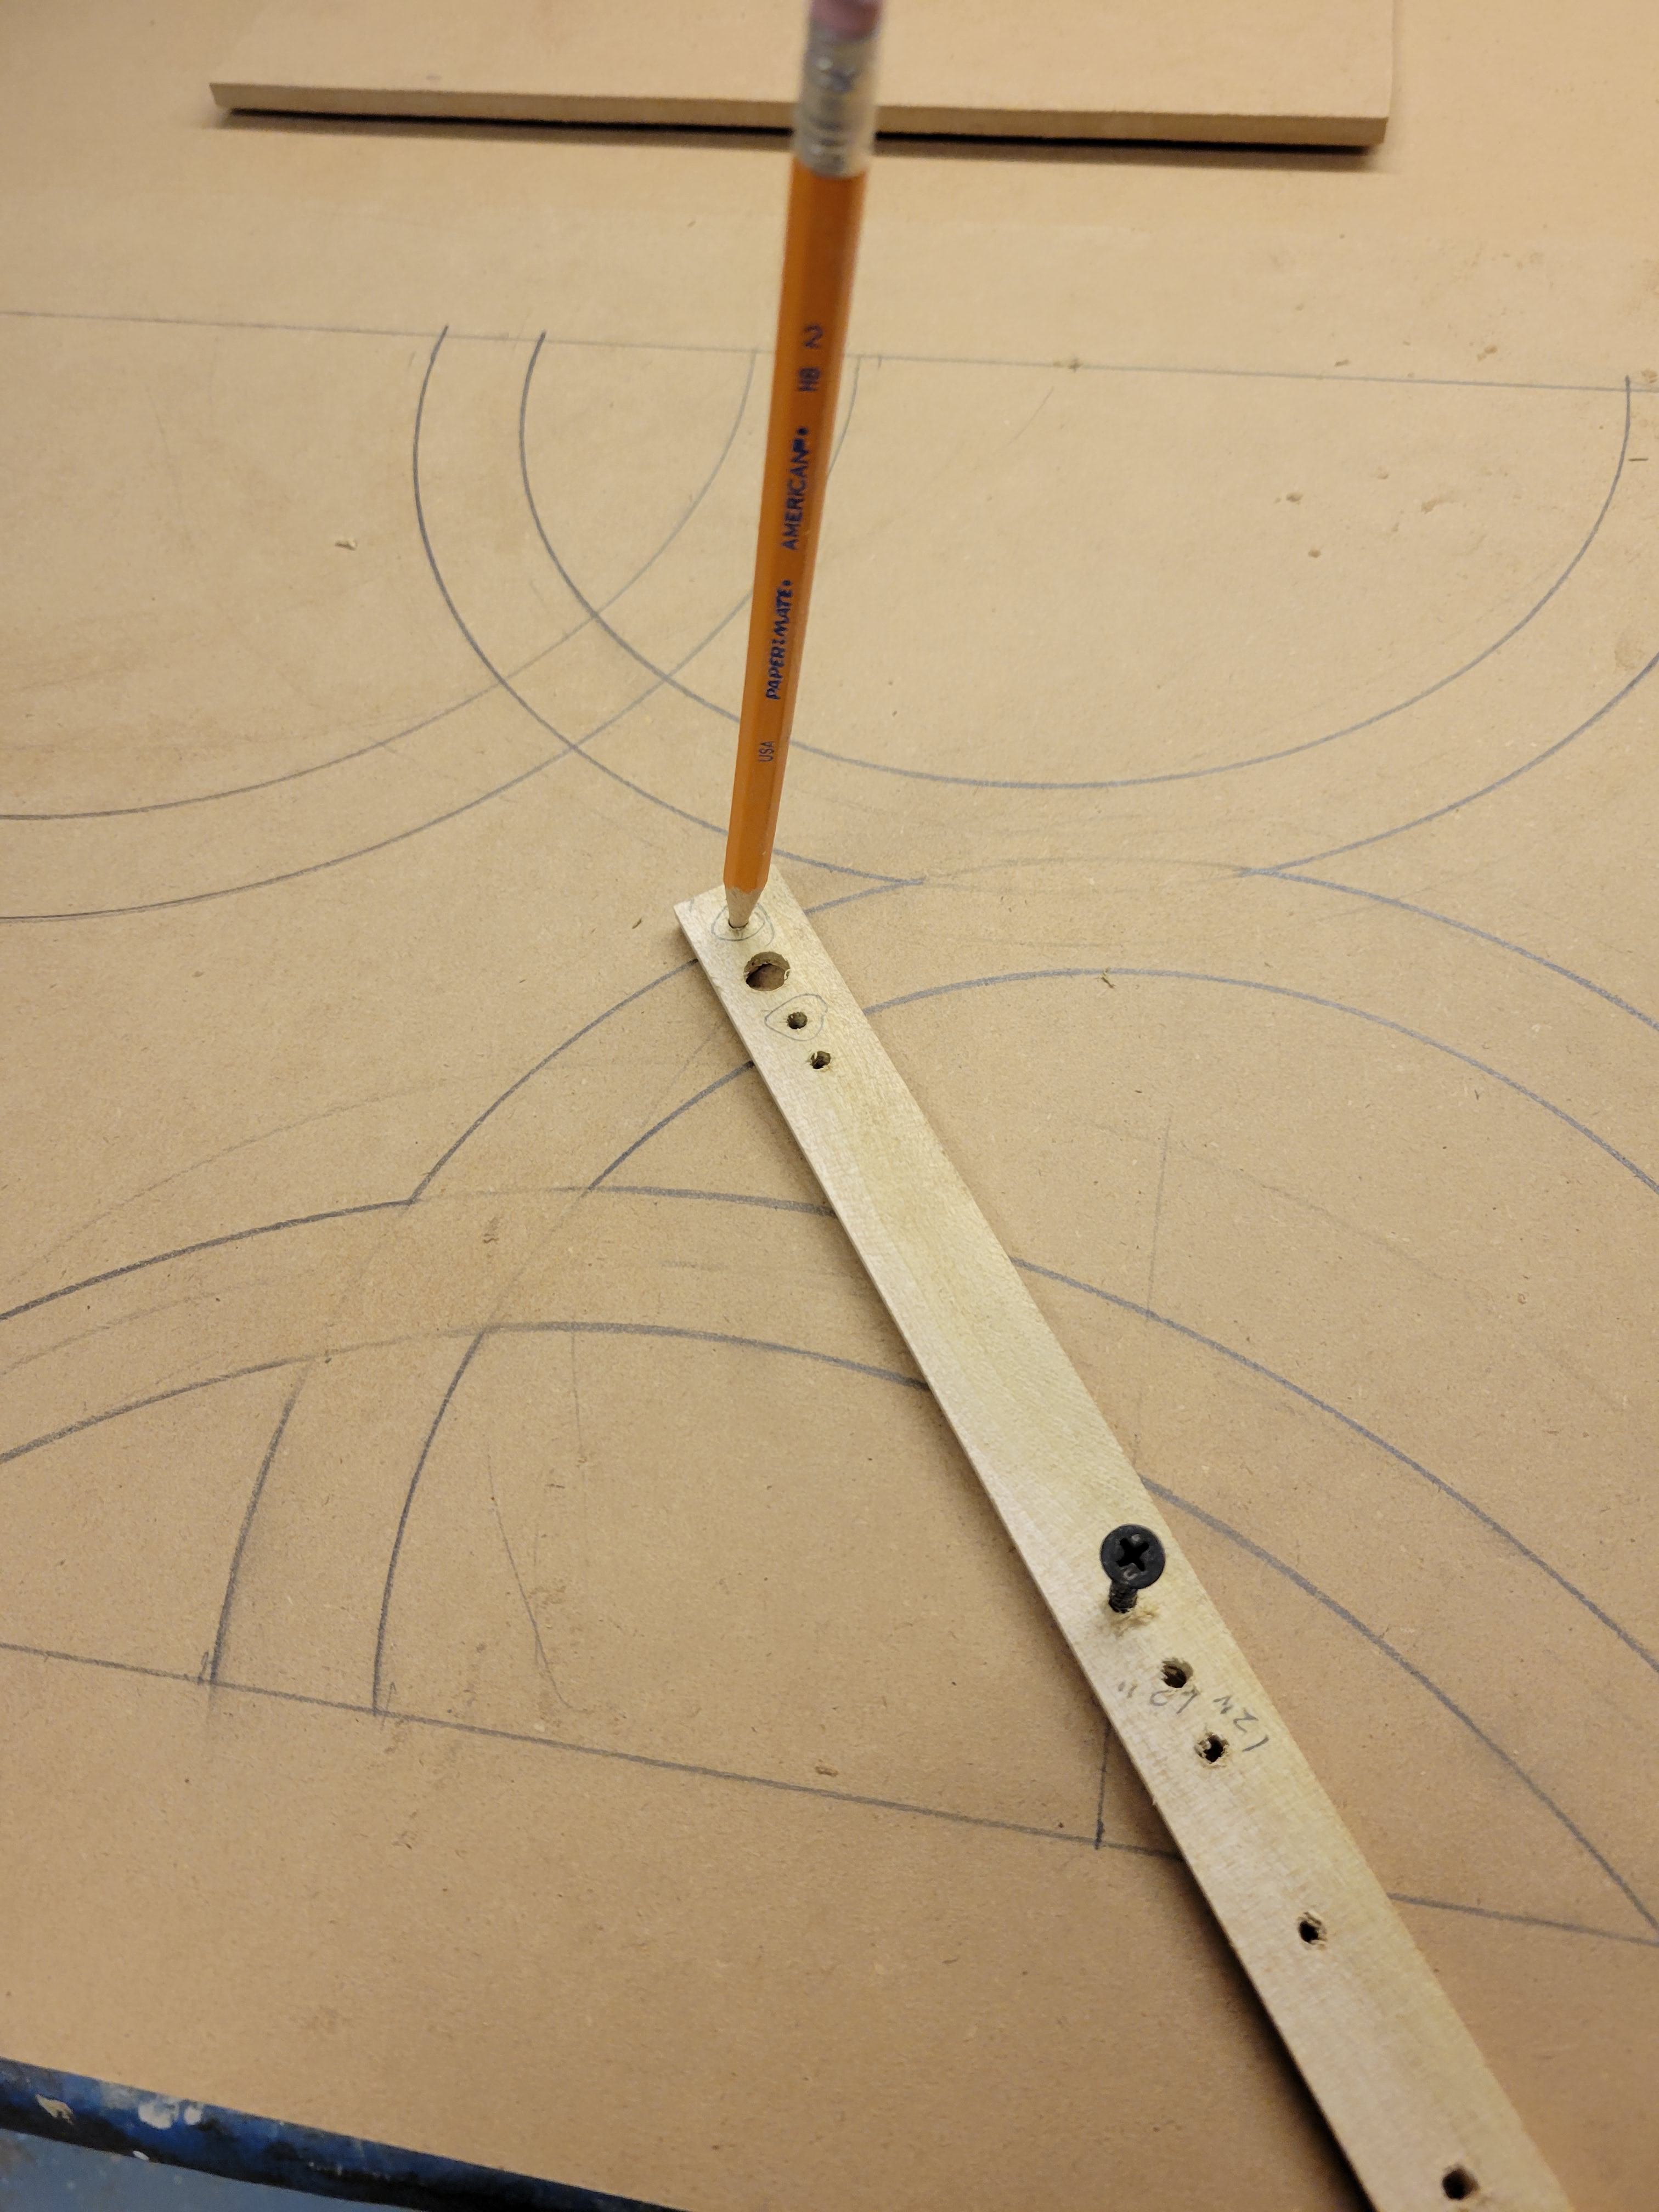
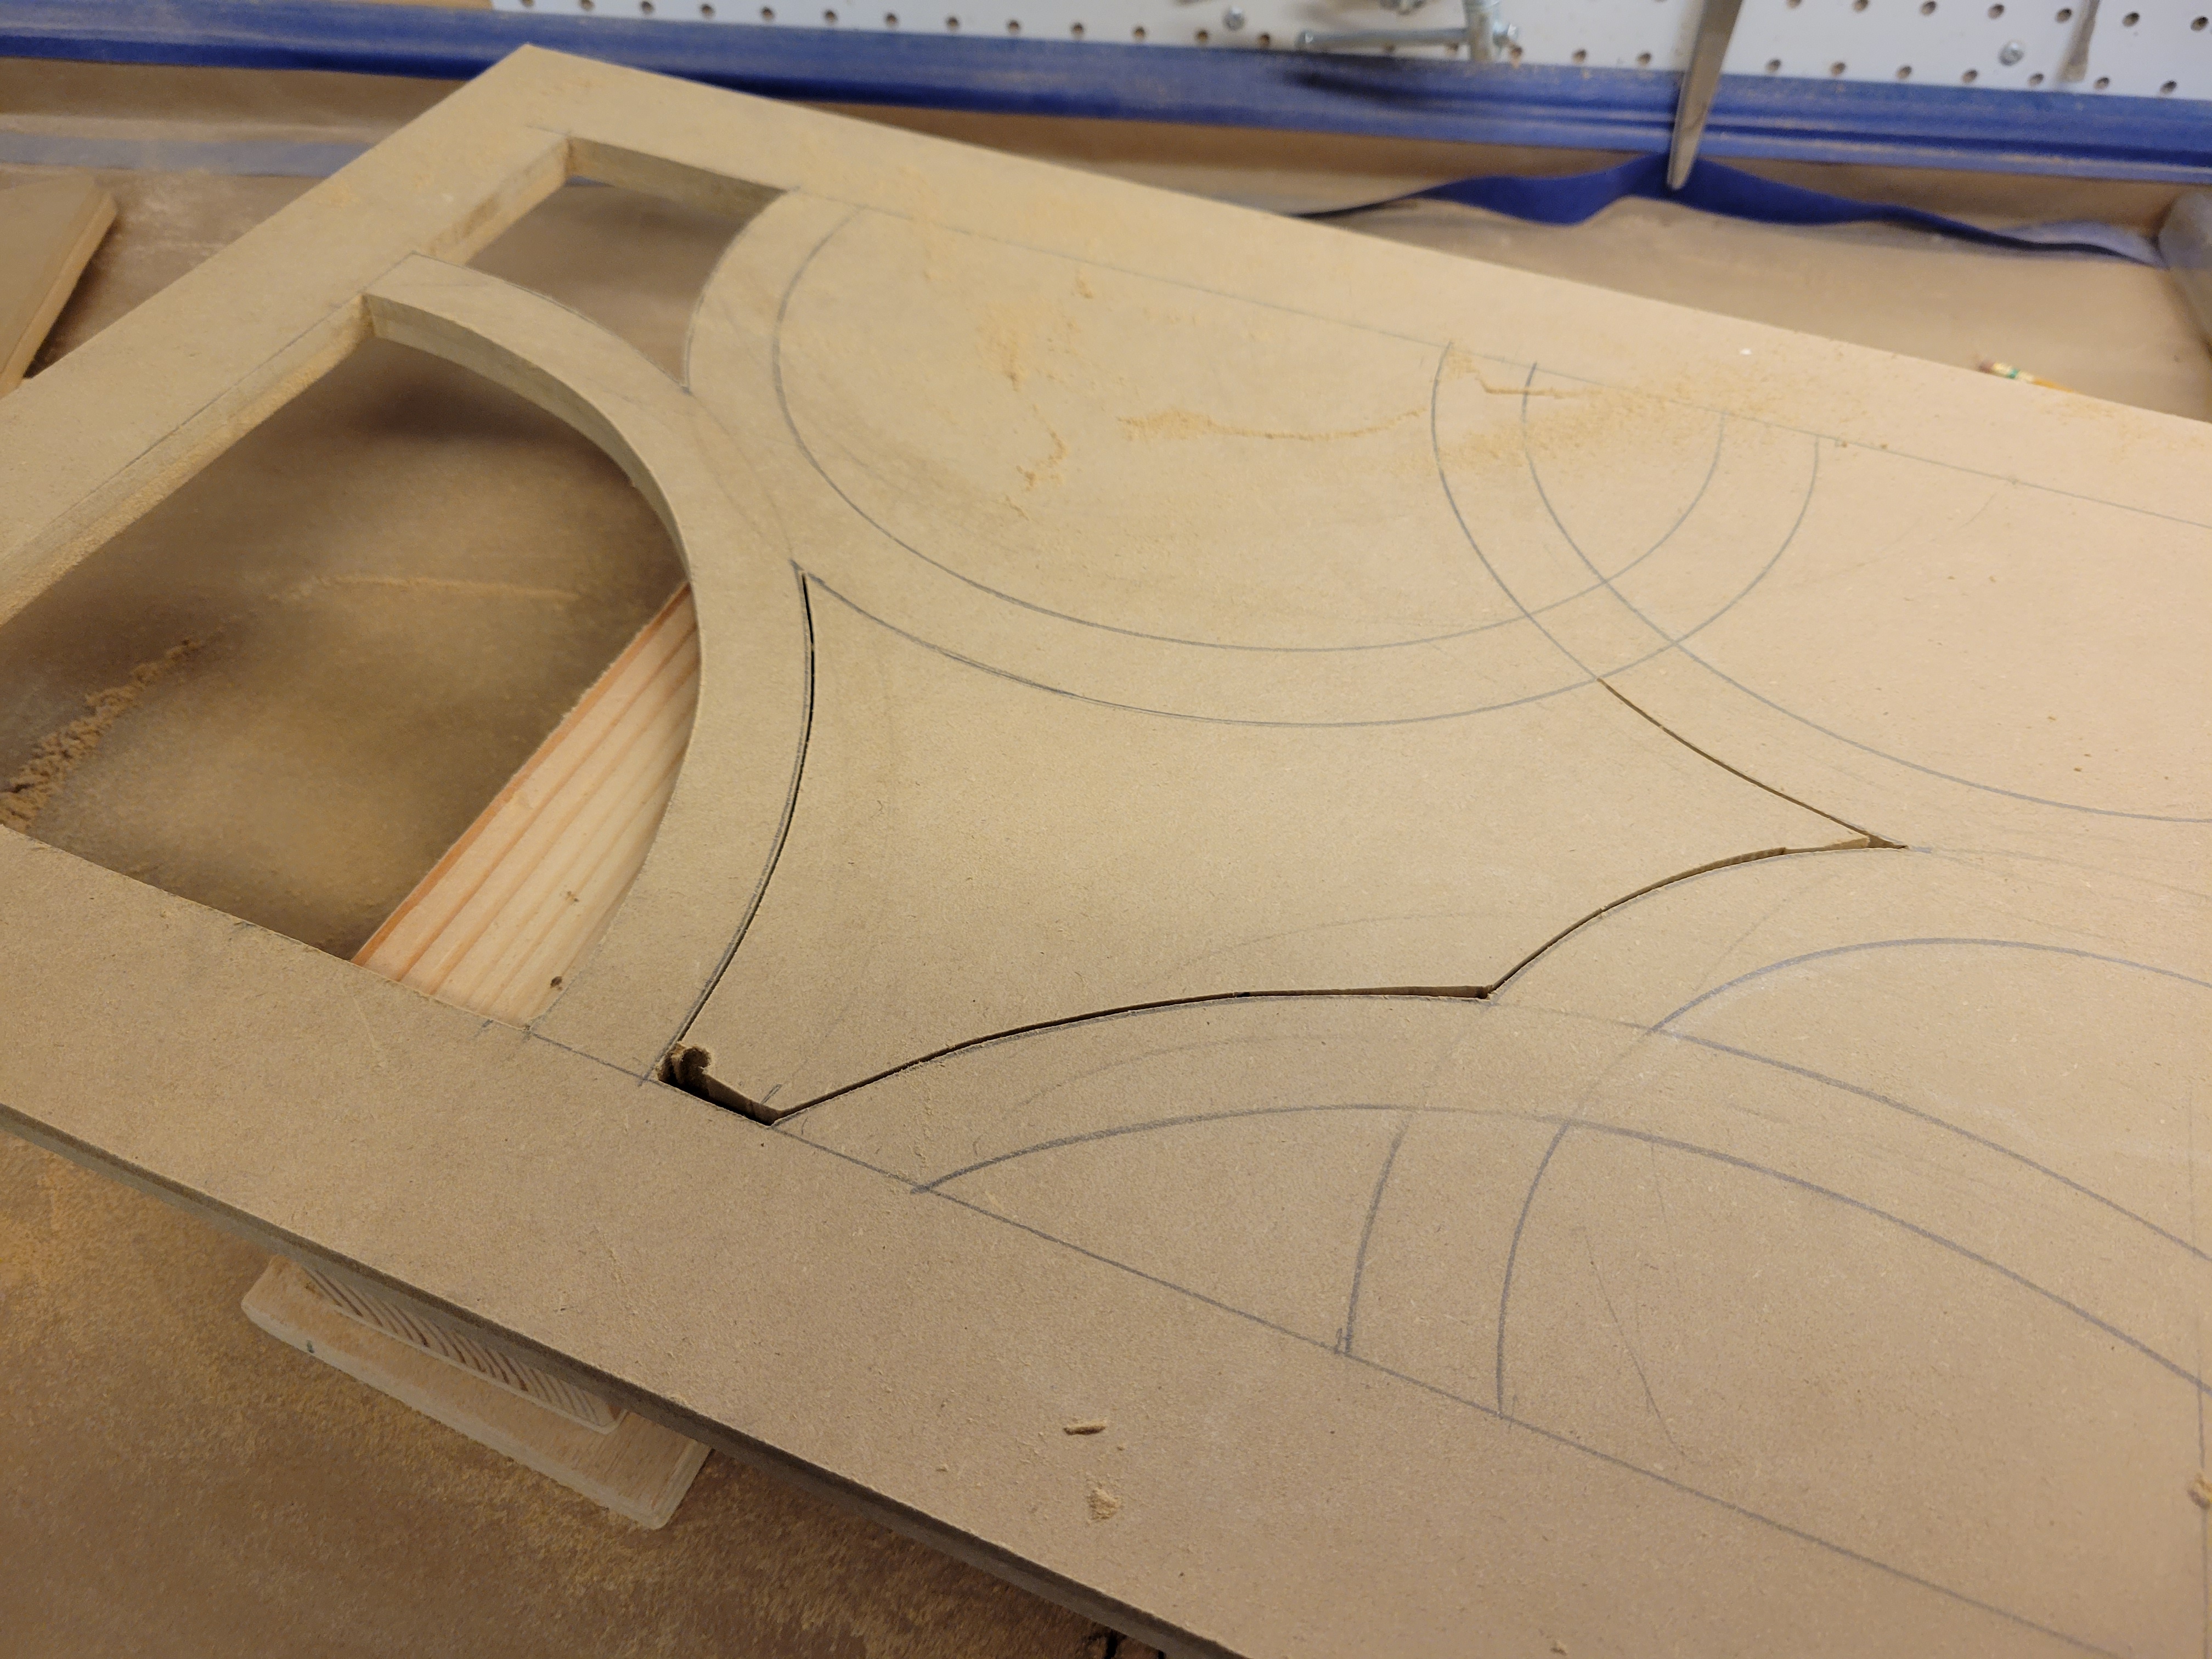
The doors on the Sauder cabinet are flat, like they are carved out of a single piece of MDF. I decided that to mimic this, I would use quarter-inch for the whole face of the door, and then add half-inch strips on the back to simulate the frame and provide me the recess I needed for the glass. The first thing though is that pattern. How the heck am I gonna simulate that? Simple is almost always better. I used a thin stick, drilled a couple of holes to stick a pencil through, and then made a few pivot points to make different diameter circles. (The photo shows this better.) To replicate the pattern, I used a tried and true technique—I guessed. I think the pattern looks pretty good.
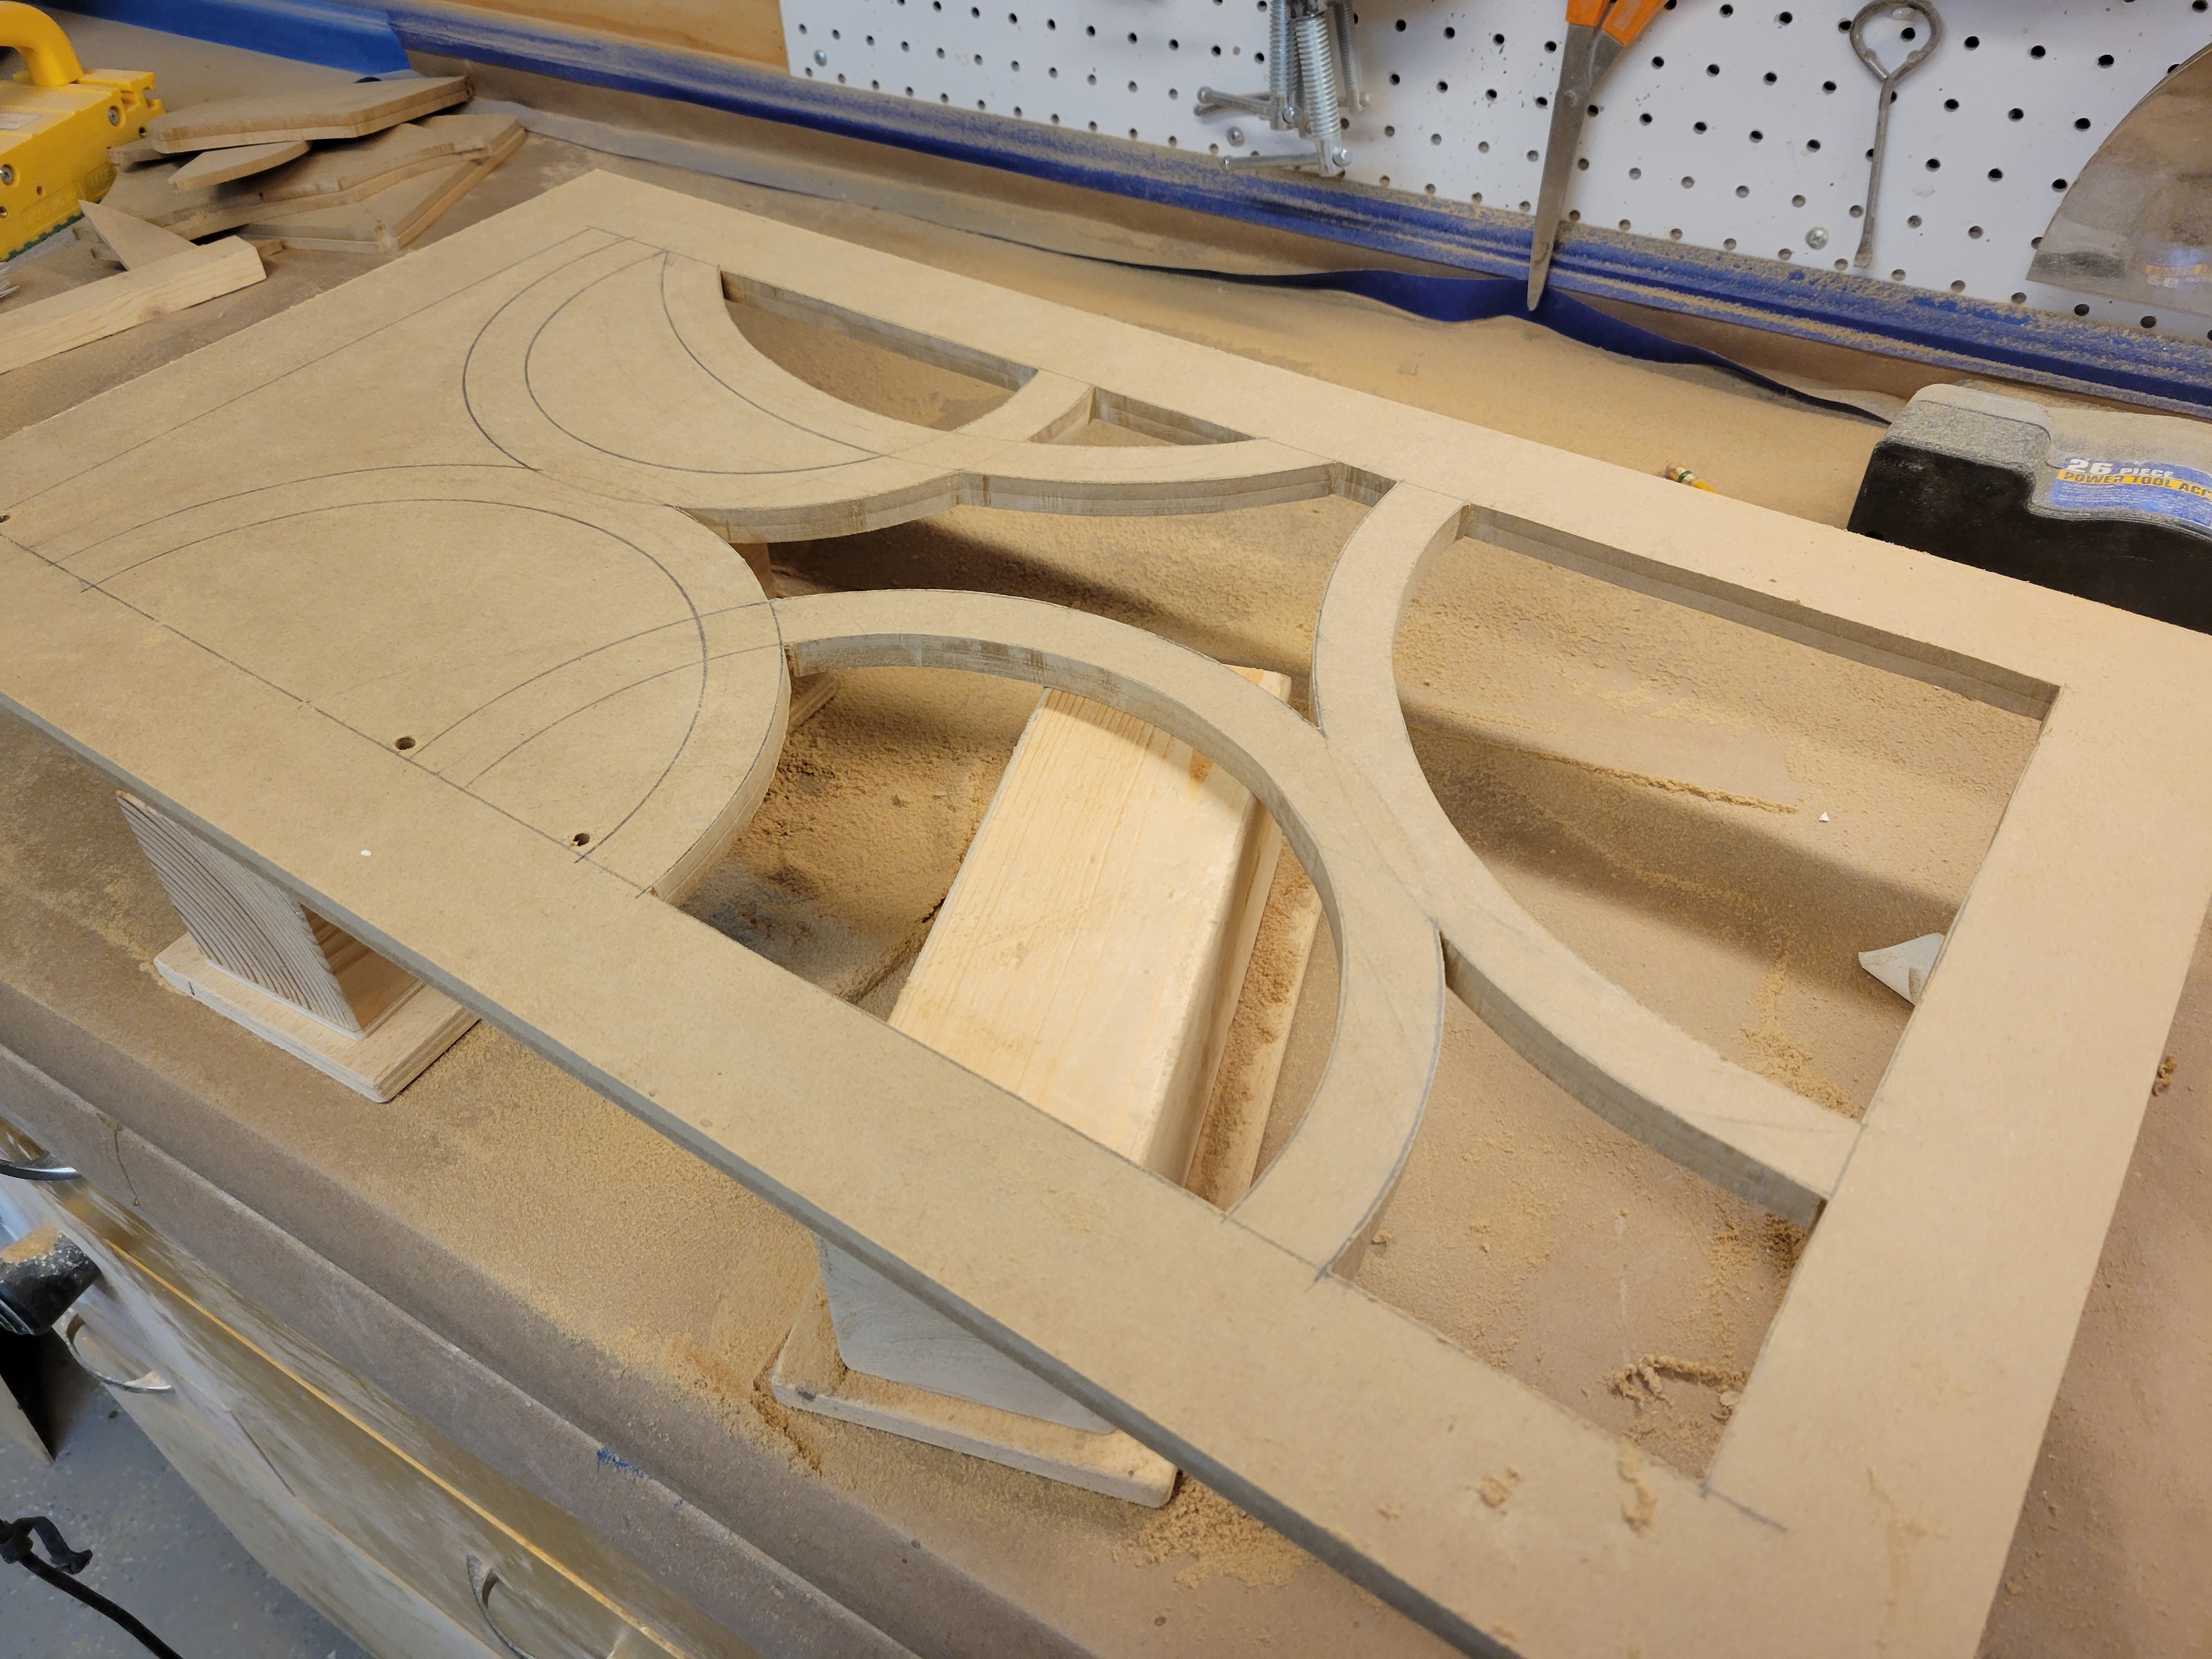
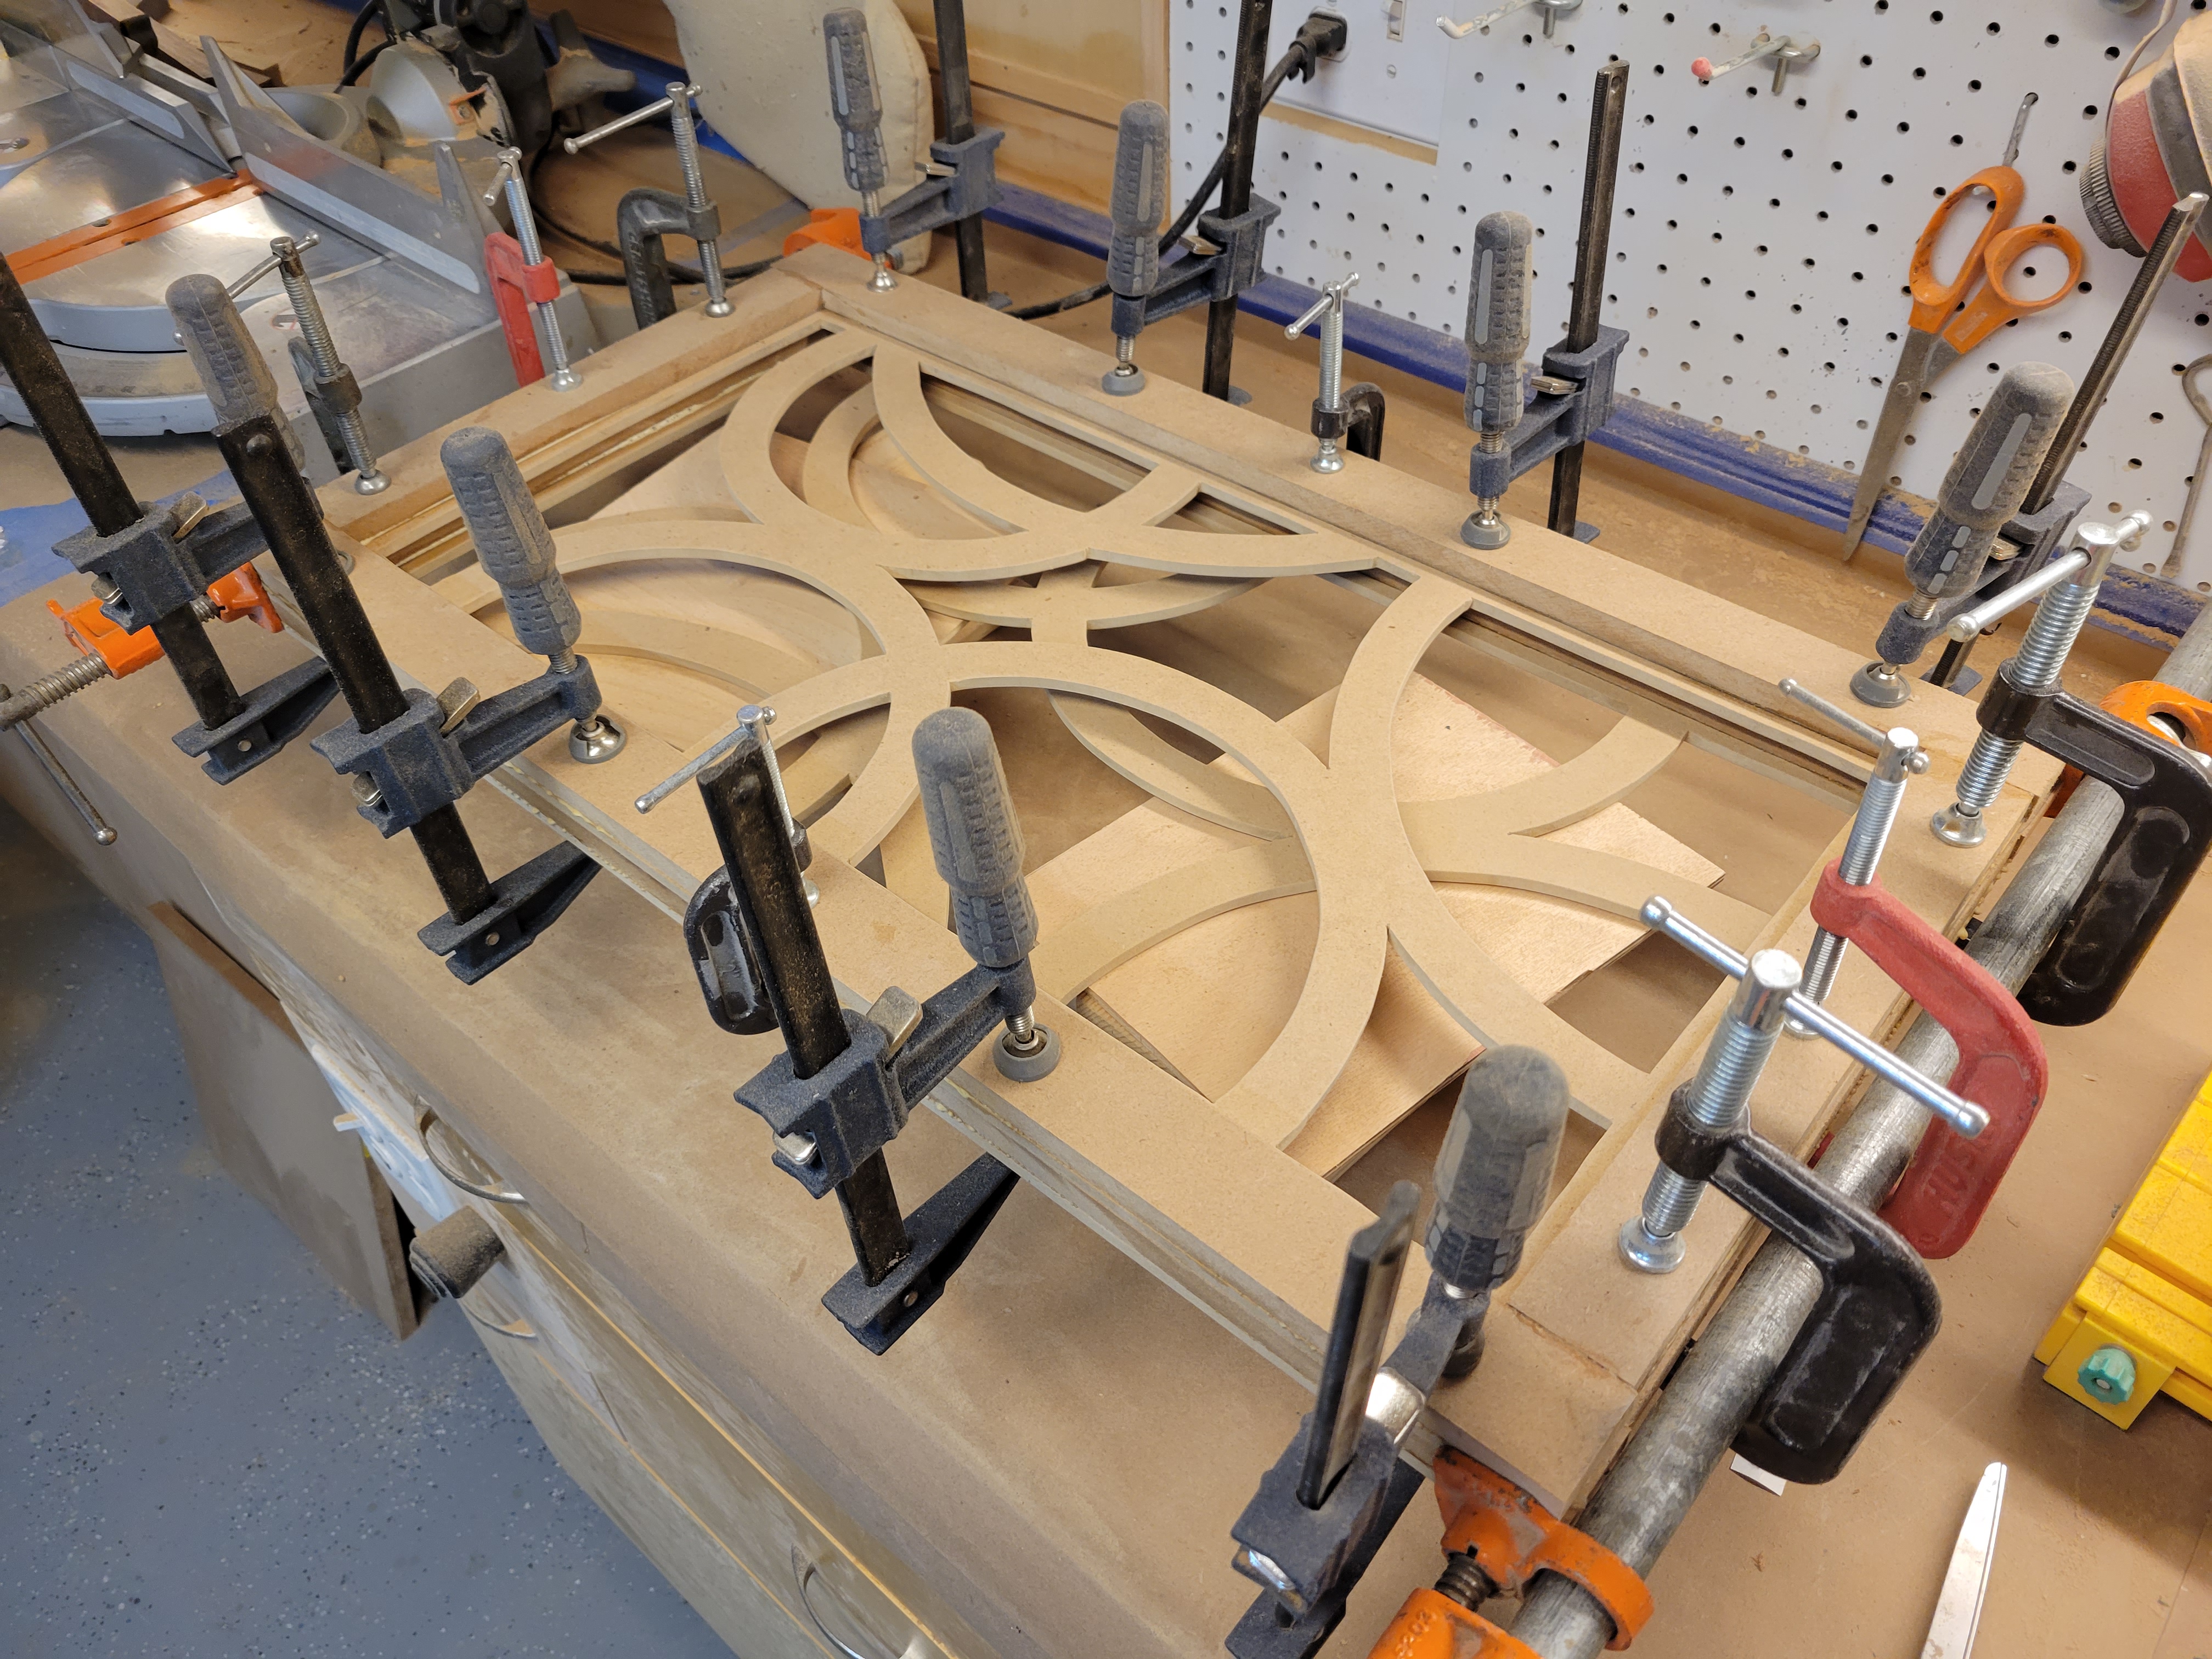
To get the mirrored image for the left and right door, I did exactly what you probably guessed I did. I used double-stick tape to stick the quarter-inch panels together, and cut them both at the same time. Since I don’t own a computer-controlled router, I went with the simple (poor man’s) version, which is a 10 TPI (Teeth Per Inch) blade in my jigsaw. Careful now… Take your time, and stay to the outside of the line. Took some time, but I got a good result this way. I also sanded them while they were still stuck together. The only thing after that was a band of one-and-a-half-inch-wide strips of half-inch MDF for the frame. (1/4-inch-thick face and 1/2-inch-thick frame equals 3/4-inch thick doors) I used a ton of clamps, and they came out great. (*TIP: Make sure all those pieces don’t slide all around once you start clamping things down.)
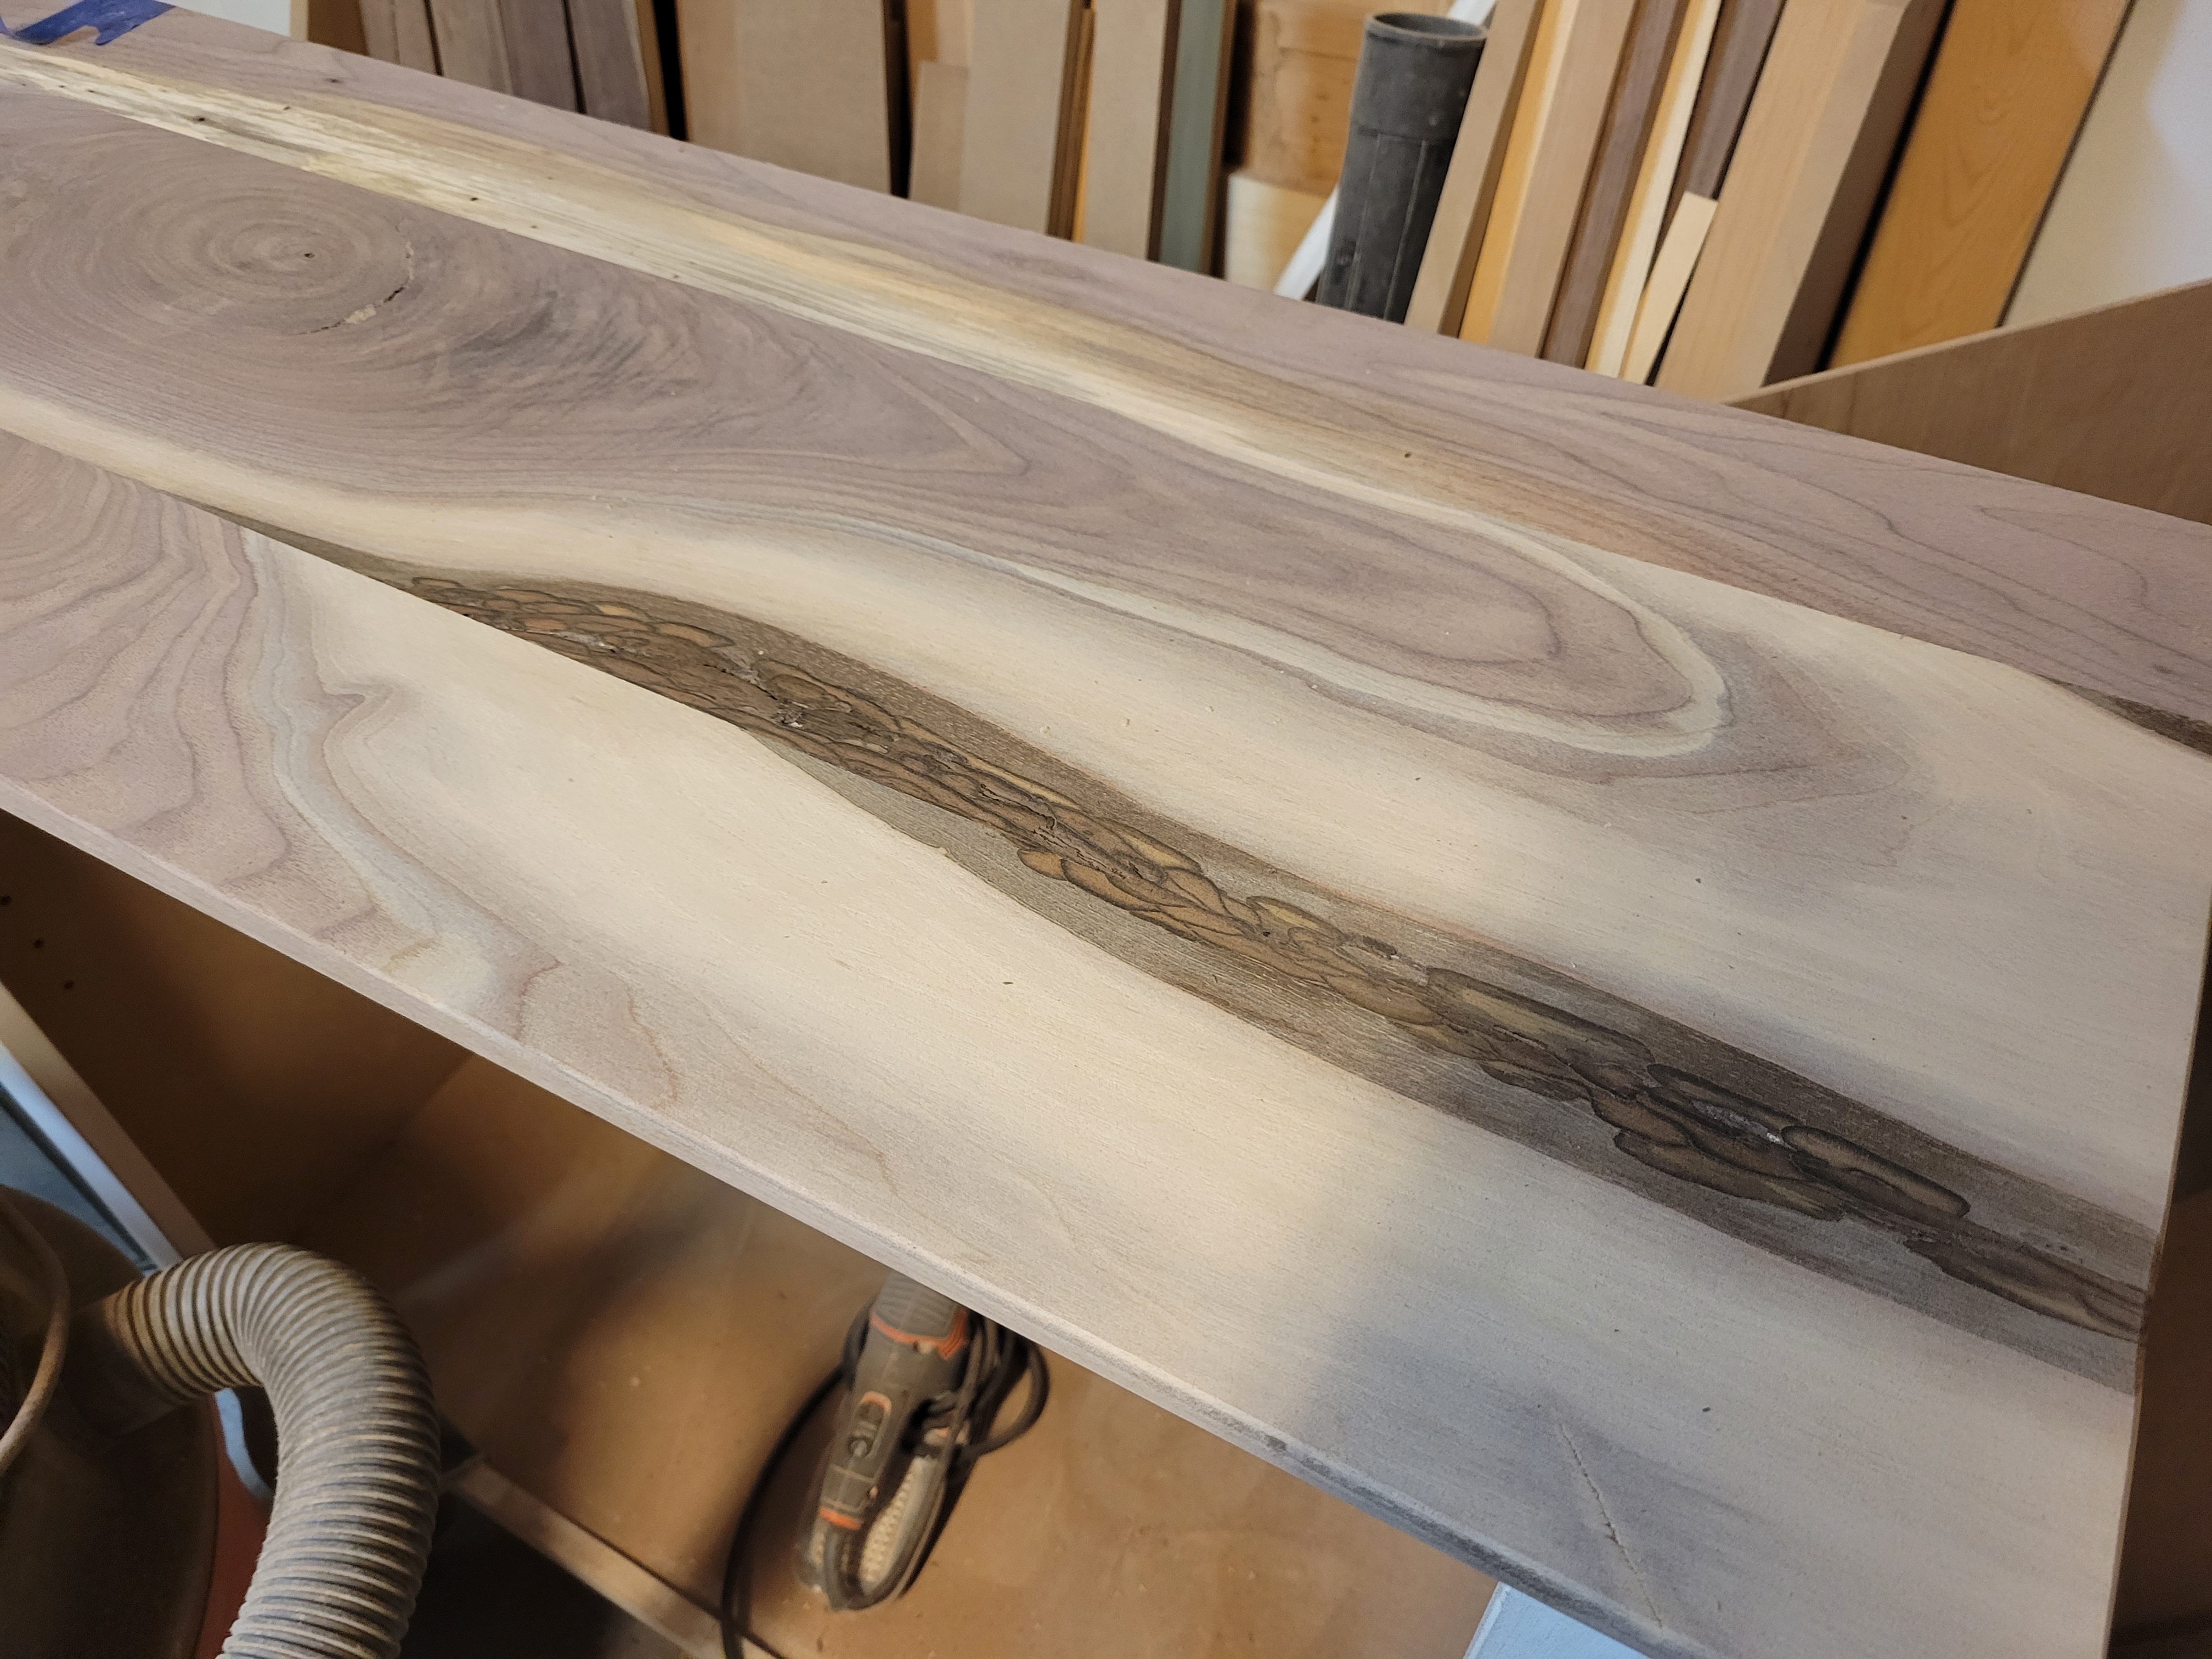
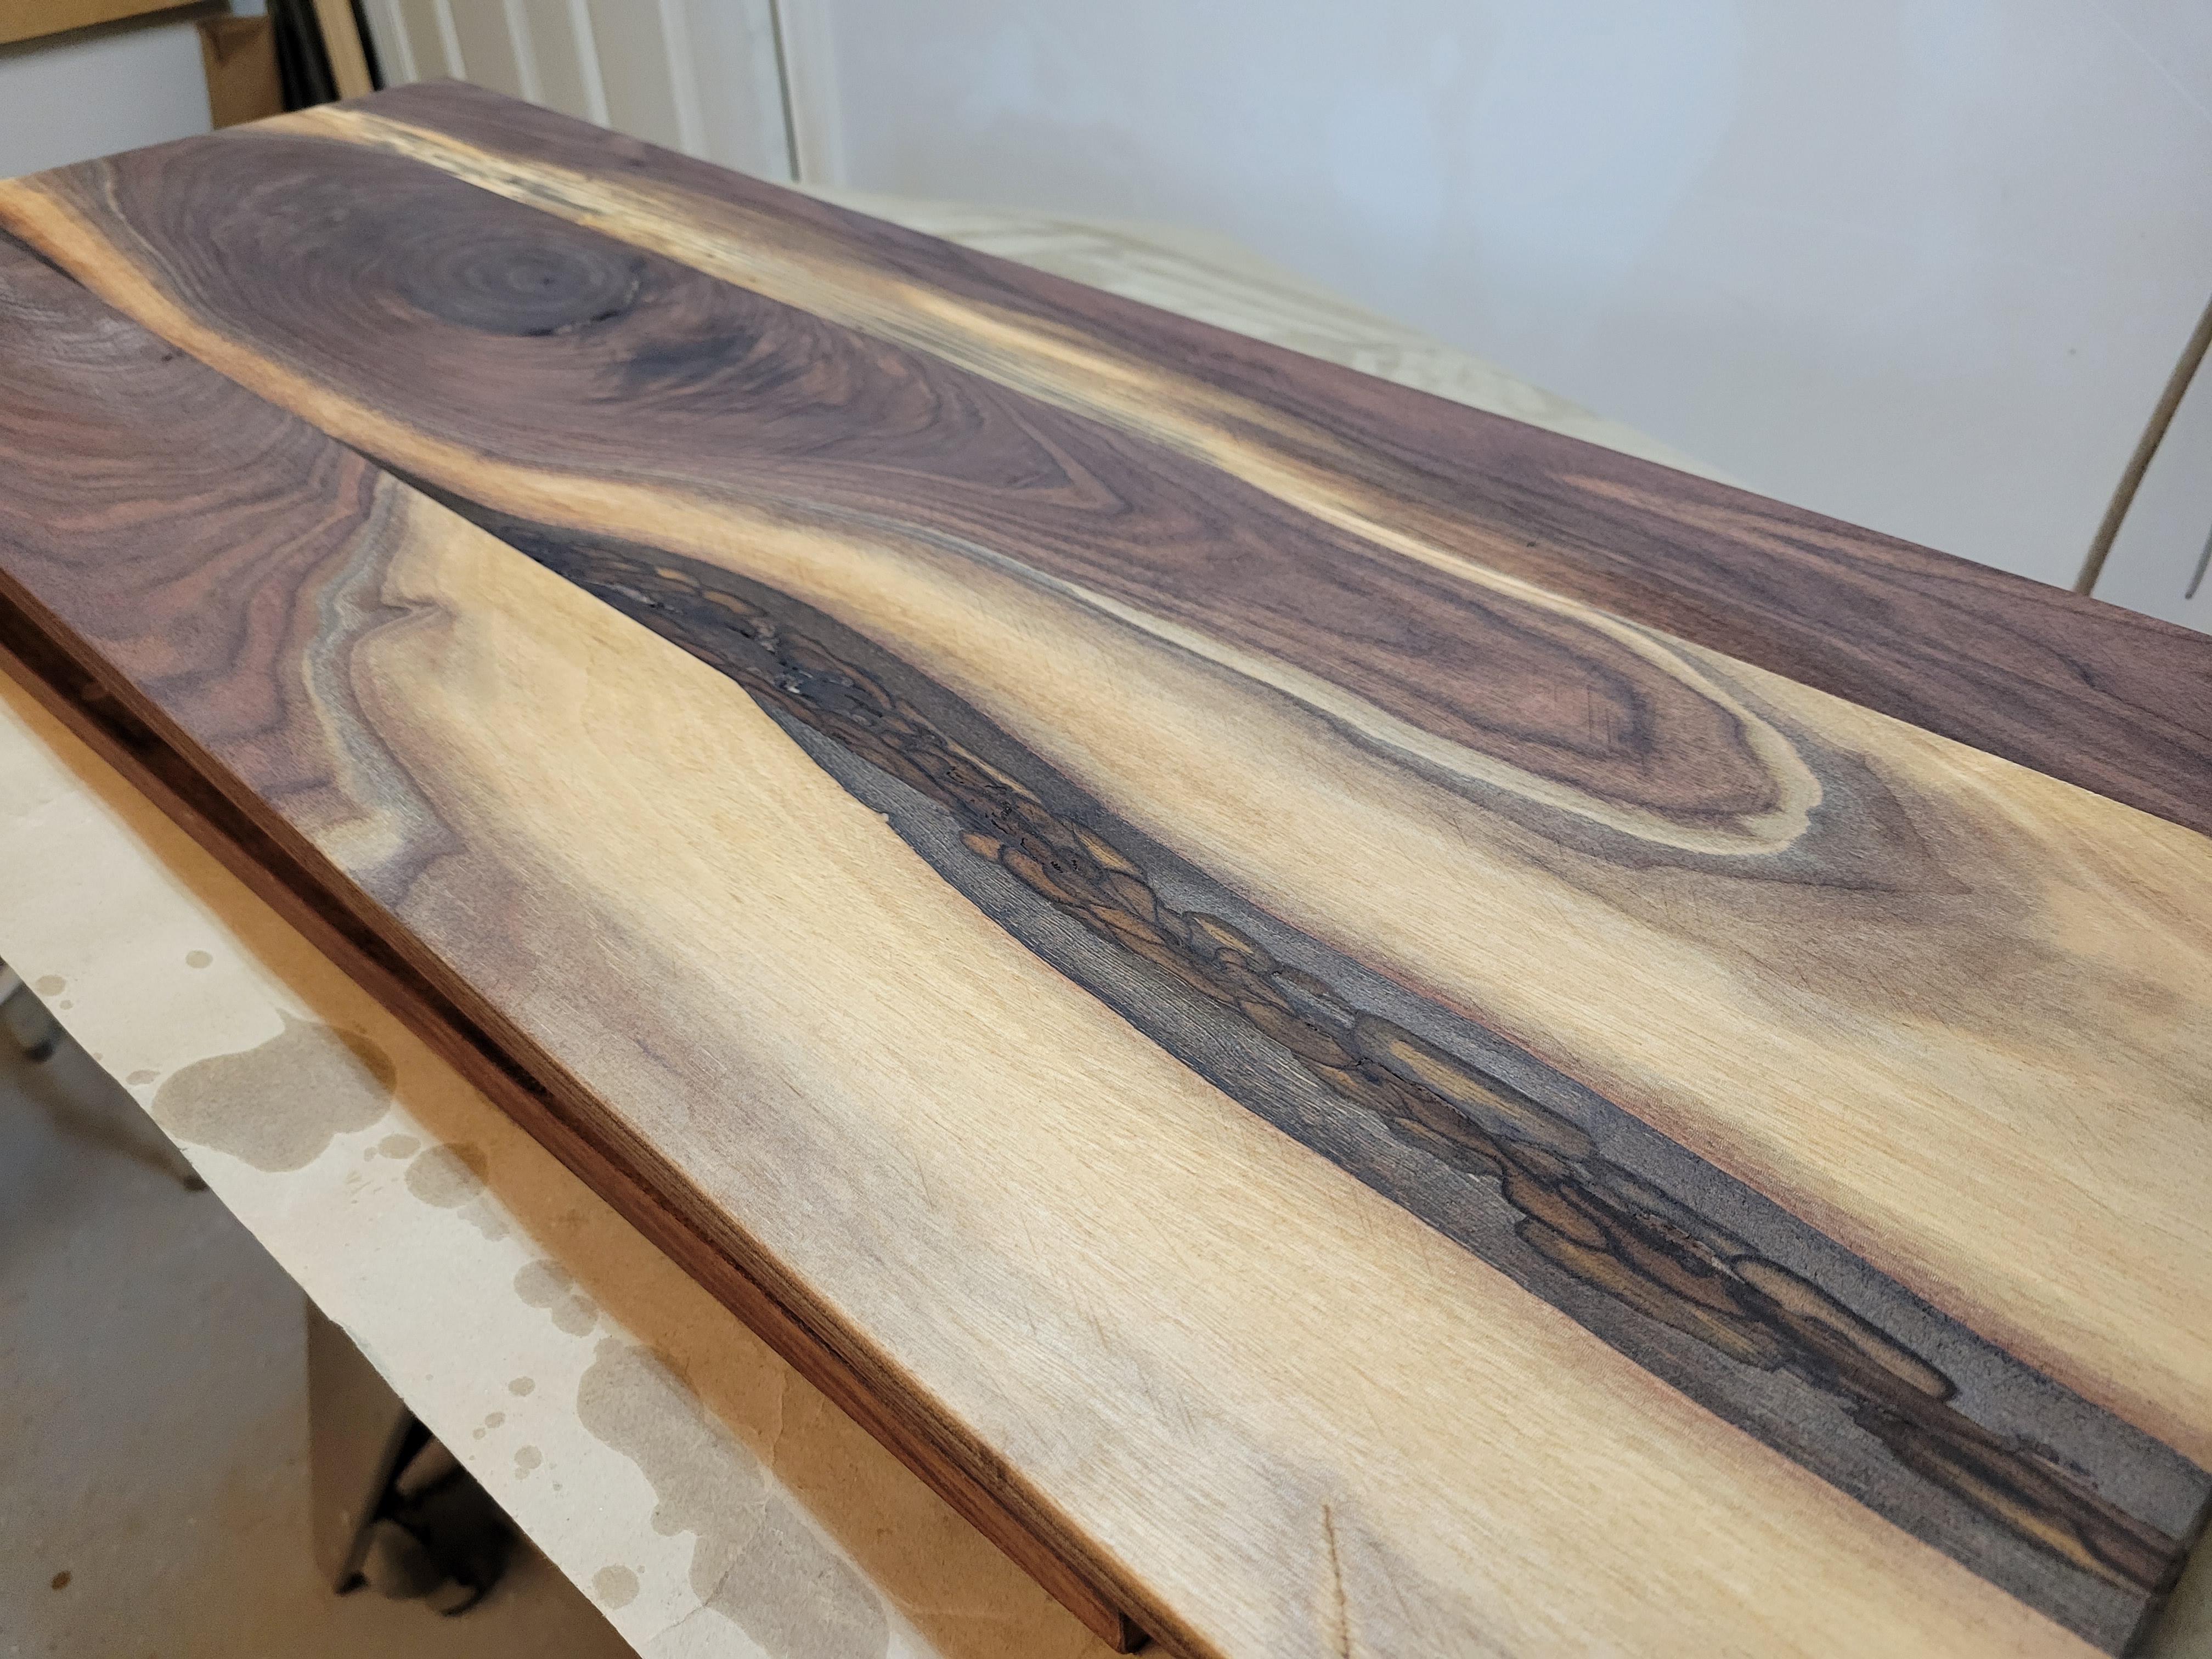
Now for that top. I had hoped to have a “proper” live-edge to use there, but the pieces I had were edged mostly straight, save for a little bit of bark from the curve of the tree. It just wouldn’t have looked right. Could I have put a few of the live edges together and done a resin pour? I don’t think it would have been interesting enough. But, the bark seemed nice and tight, and it didn’t go all the way through the boards, so I jointed them, as well as some of the walnut sap wood. When I laid all this stuff out, I have to say, I thought I’d have to scrap it and start over. But, I stuck it out, threw a couple biscuits in there, and glued it up. The bark gave me a fairly unique looks in the middle of the board, and I lined up the sap wood in a pattern that suited me. It all lit up with a coat of penetrating oil and a few coats of amber shellac. I now really like the way this looks.

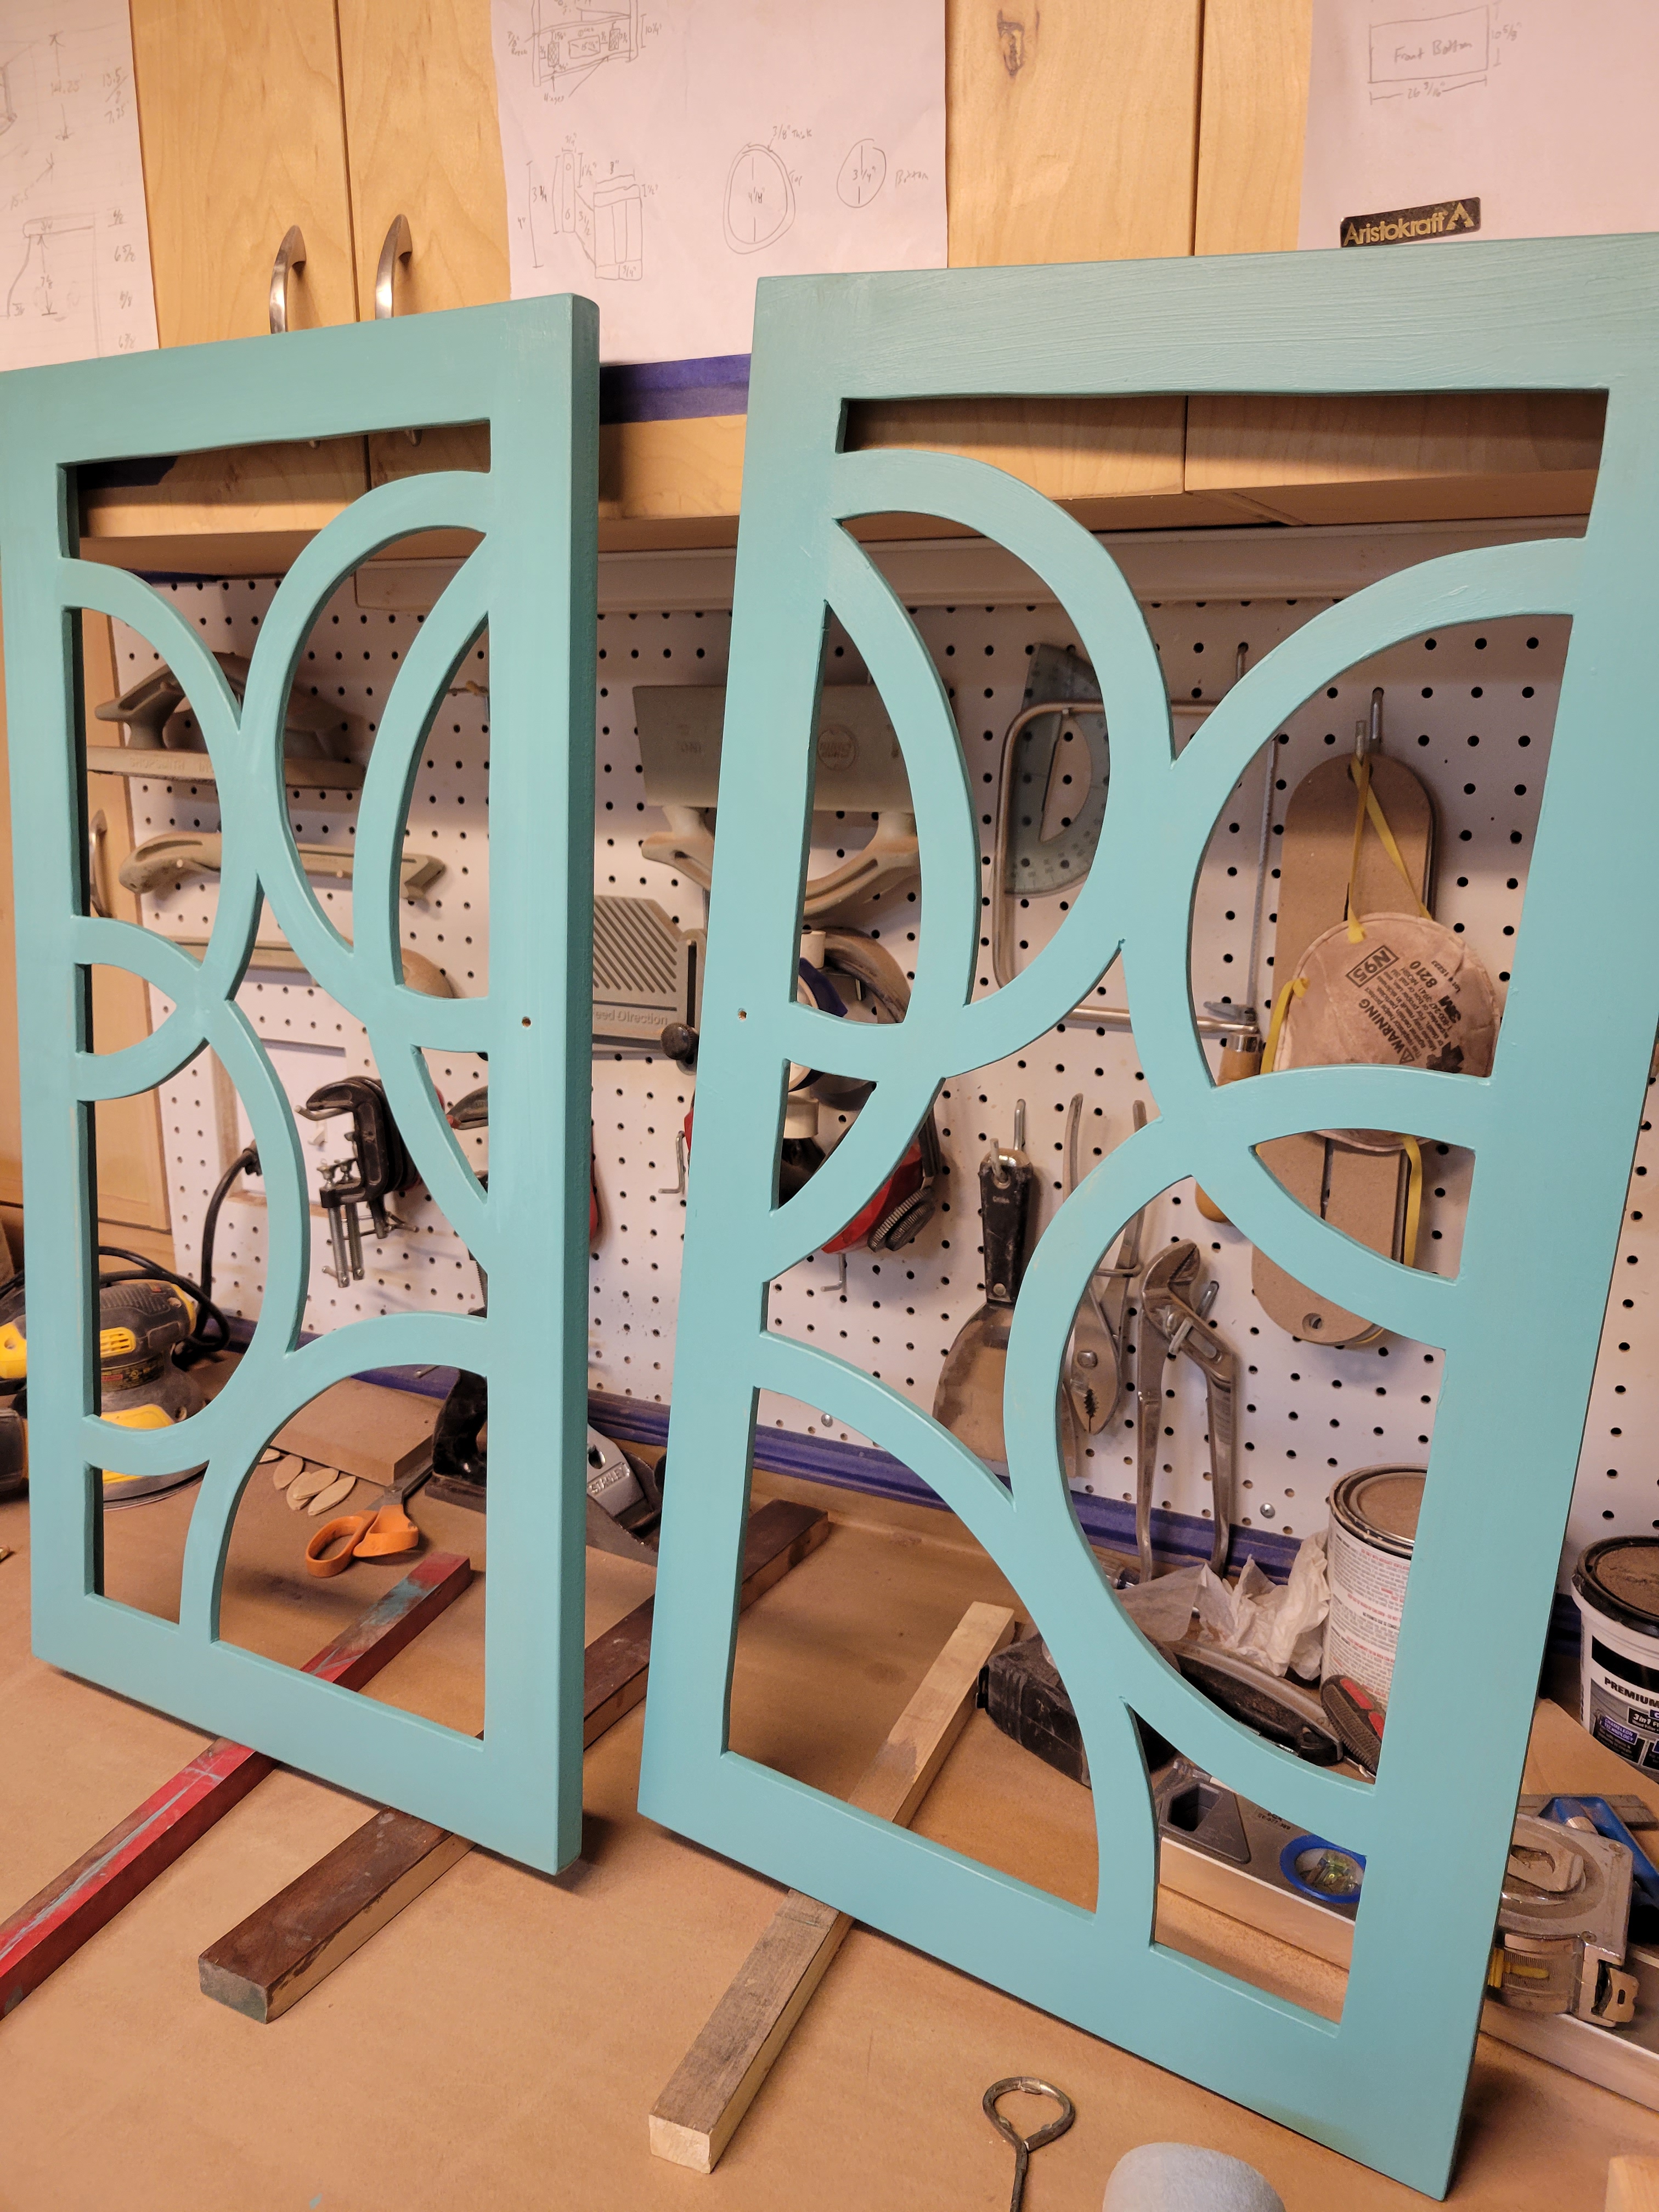
I hand-planed a chamfer around the bottom edge of the front and sides just to lighten up the appearance of the thickness. I cut the glass for the doors and set that in place. Then I tackled the hardware. Since this is MDF, which loves to split if you drive nails or screws into the edges, I went with wrap-around hinges to give me access to the flat surfaces on the back of the doors and frame. I did pre-drill for the hinge screws into the edges of the door and had no issues at all. A couple coats of paint, a little 220 between coats, and just like that, there is my take of the Sauder Hall Cabinet.