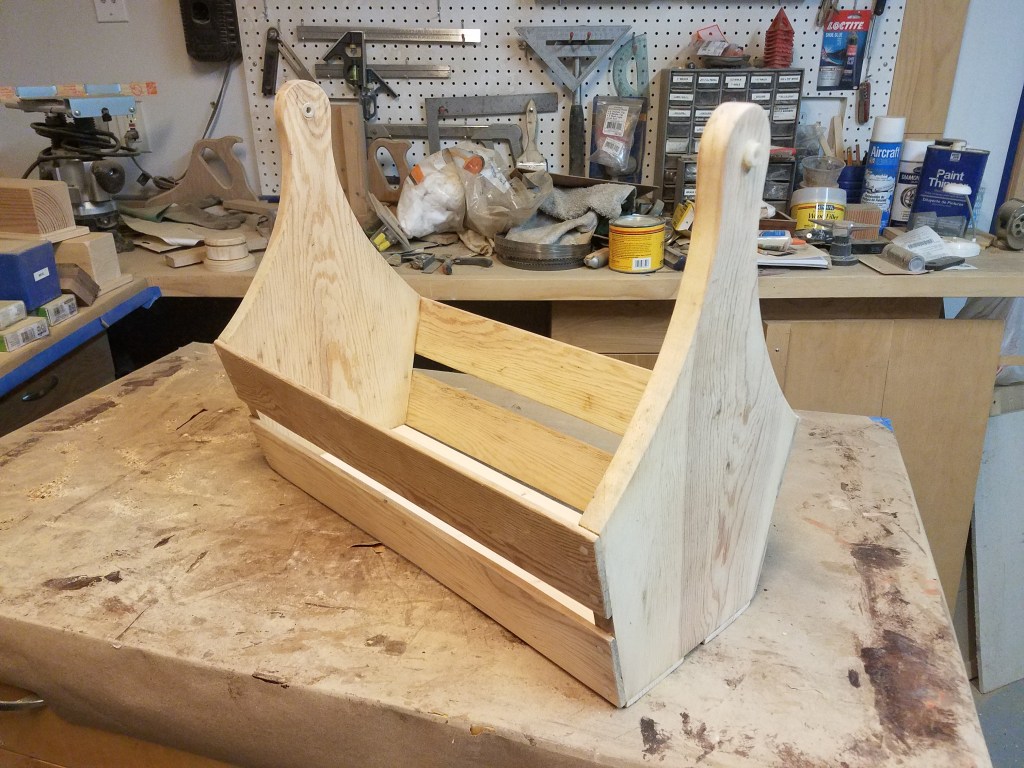
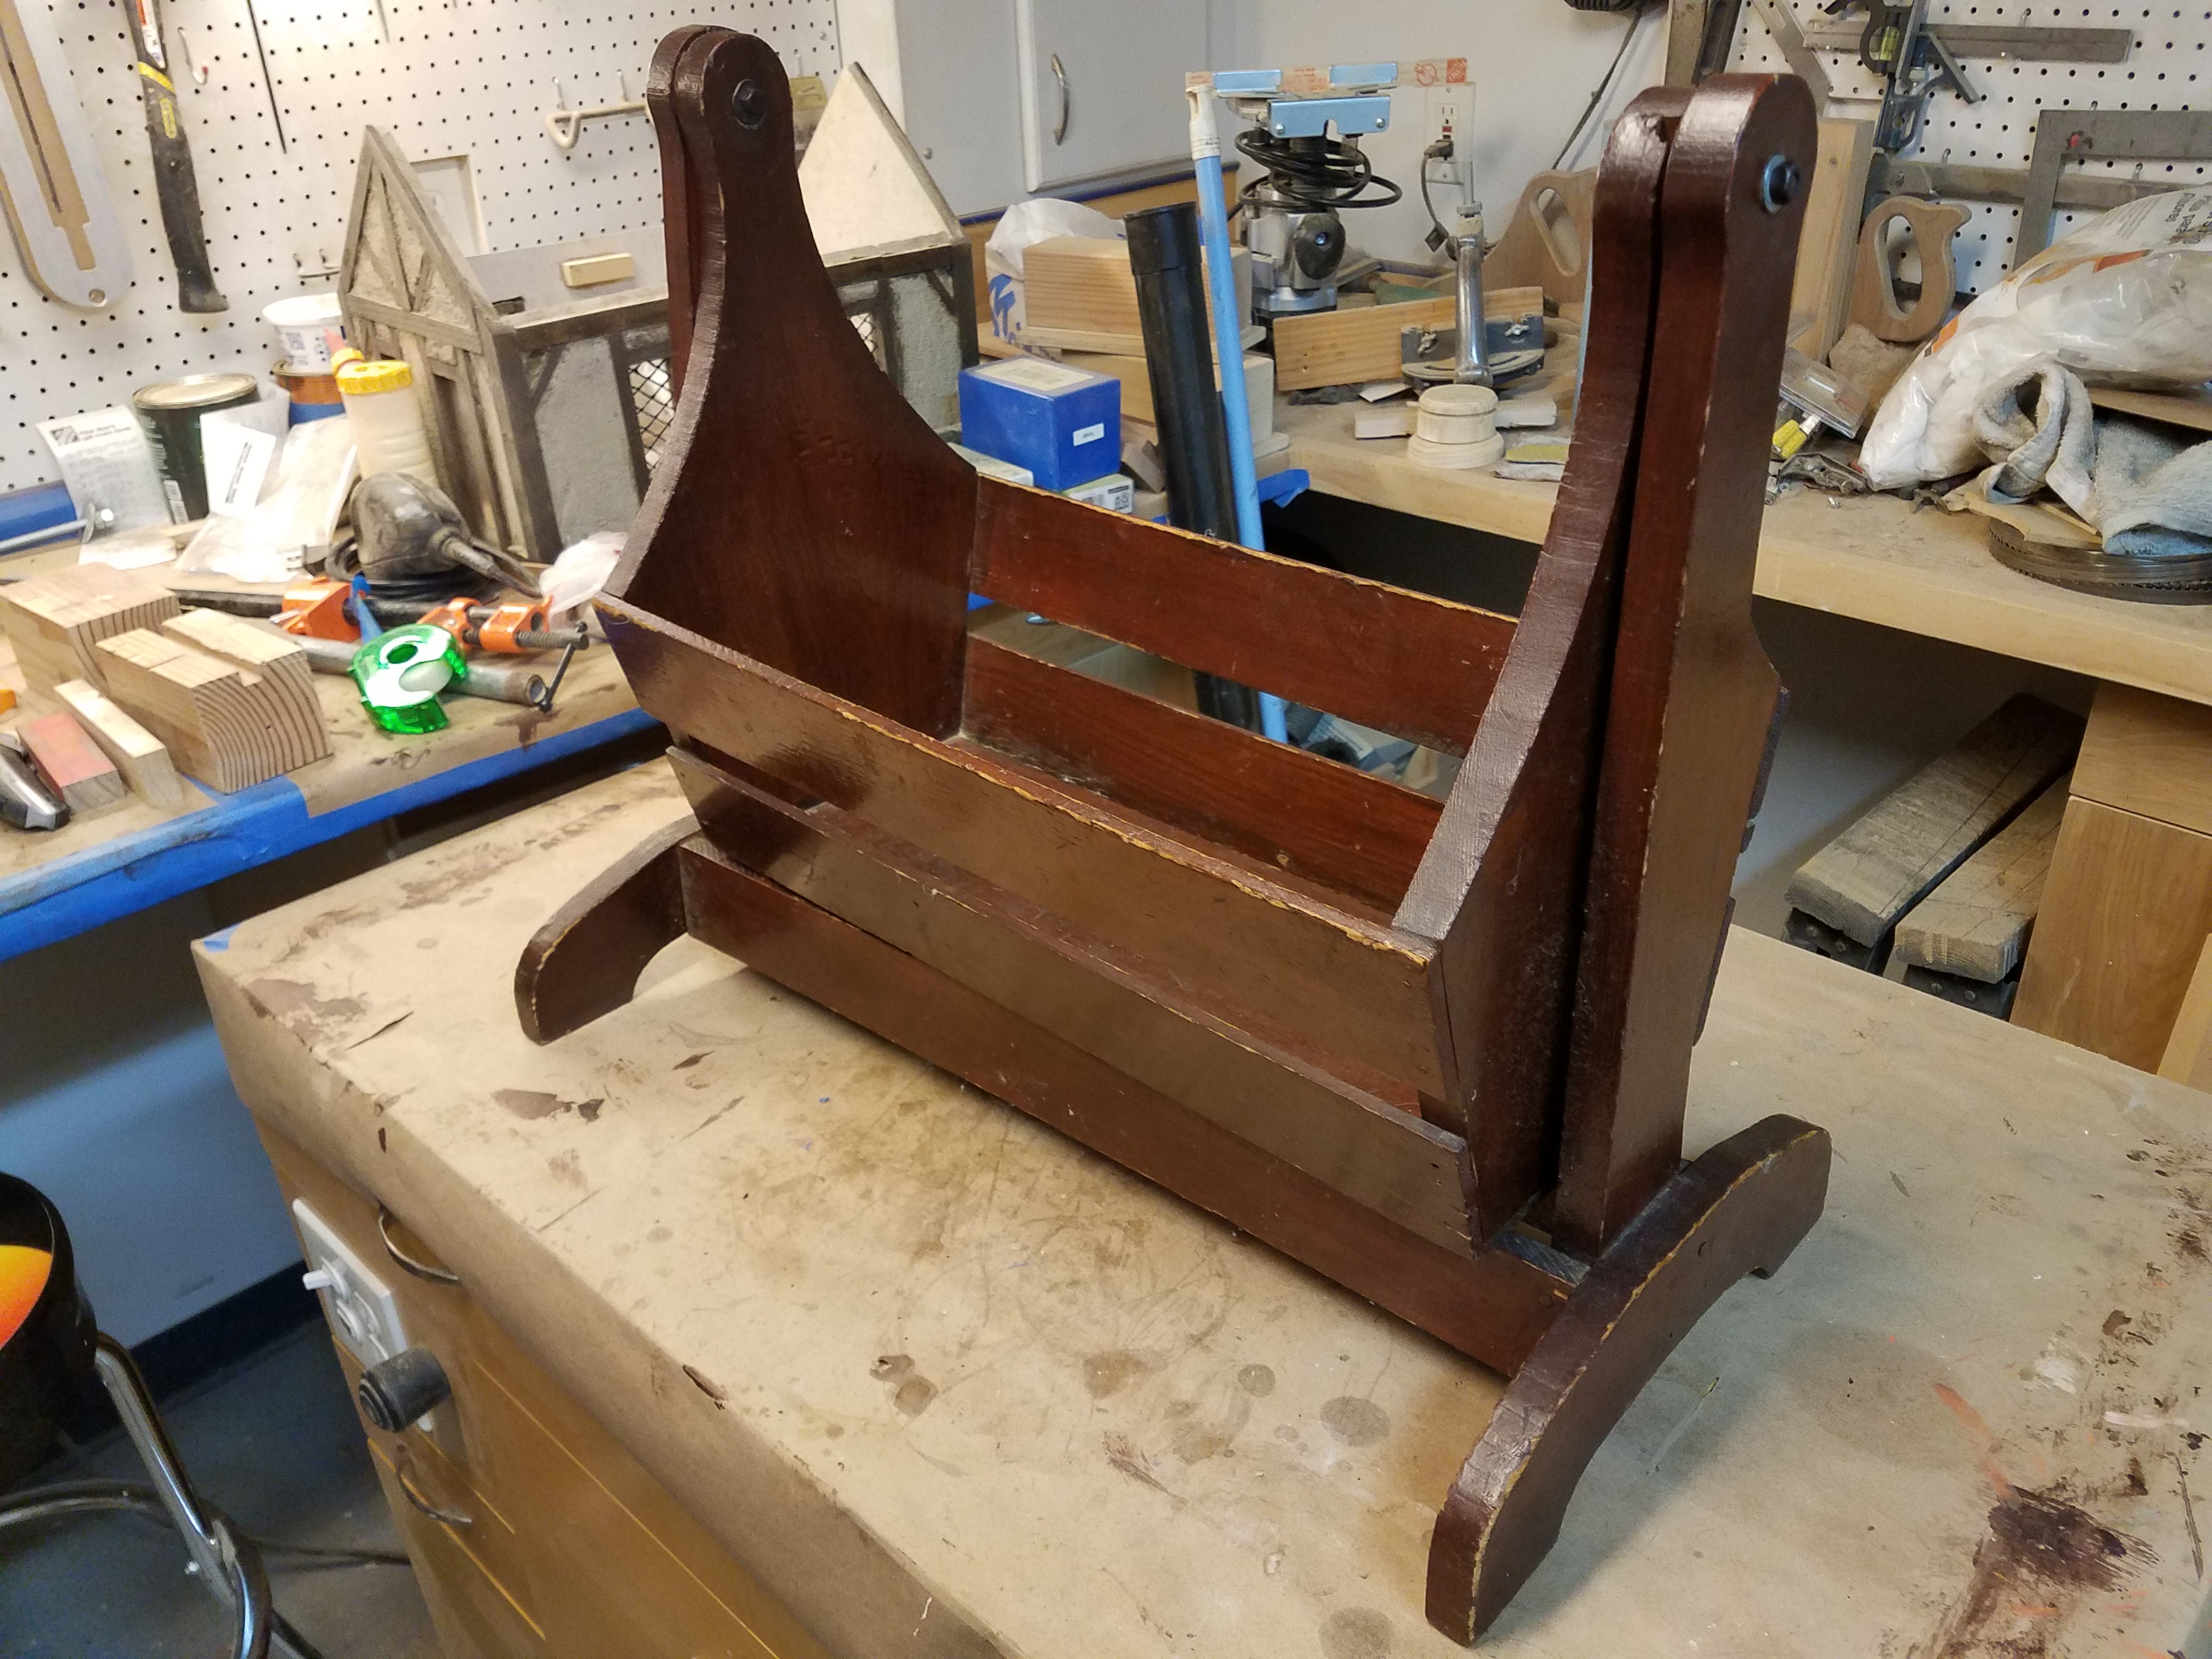
What started in the 1930s as a wooden fruit crate, became a beautiful doll cradle for a little girl. Over the past 90 years, the thin wood had dried out and become very brittle, and the slats had begun to split where the nails had been driven in. The pivot points were bolts, that with years of rocking, had worn away the holes and caused the cradle to sag to the point that it interfered with the frame and no longer rocked. So the trick for me was to honor the original craftsman, maintain as much of the original materials as possible, and hopefully help this cradle last another hundred years.


After carefully, completely disassembling the whole piece, the first step was to fix as many cracks and splits as possible. The ends of the cradle were first, and both ends had splits at the top. One had a large chunk missing. And both of the pivot holes were badly worn from where the threads on the bolts had filed away at the holes. Glue and clamps tool care of the splits, and high-performance wood filler took care of the missing chunks of wood. That filler sanded beautifully, and it took the General Finishes Gel Stain very well. The patch is nearly invisible on the finished product.
For slats that had split, the trick is to get glue into the crack. These slats are around three and a half inches wide and twenty inches long, and some of the splits were nearly half the length of the board. I tried prying the split apart to squeeze glue into the joints, but on a few boards, I just bit the bullet—I purposely split them the rest of the way. A little luck may be needed here, but what I ended up with were two pieces of wood that could then be more easily, and most solidly glued back together. On one of those slats, I split it once, glued it, and then split a different area and glued that. In the end, you can’t see any of those repairs.

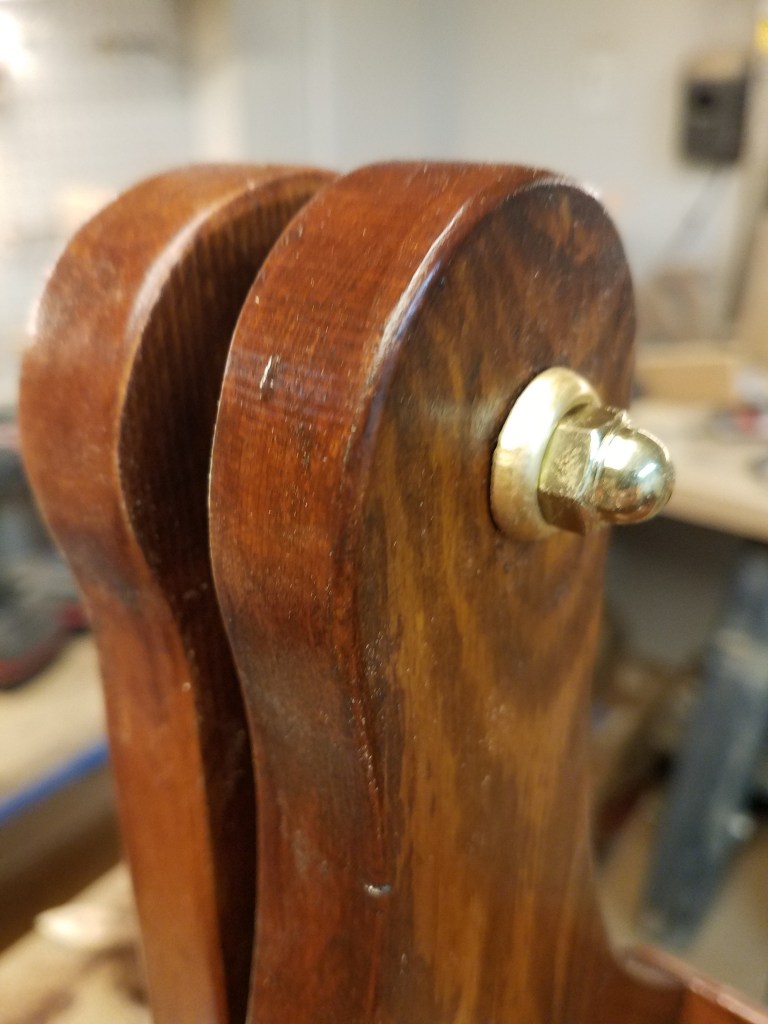
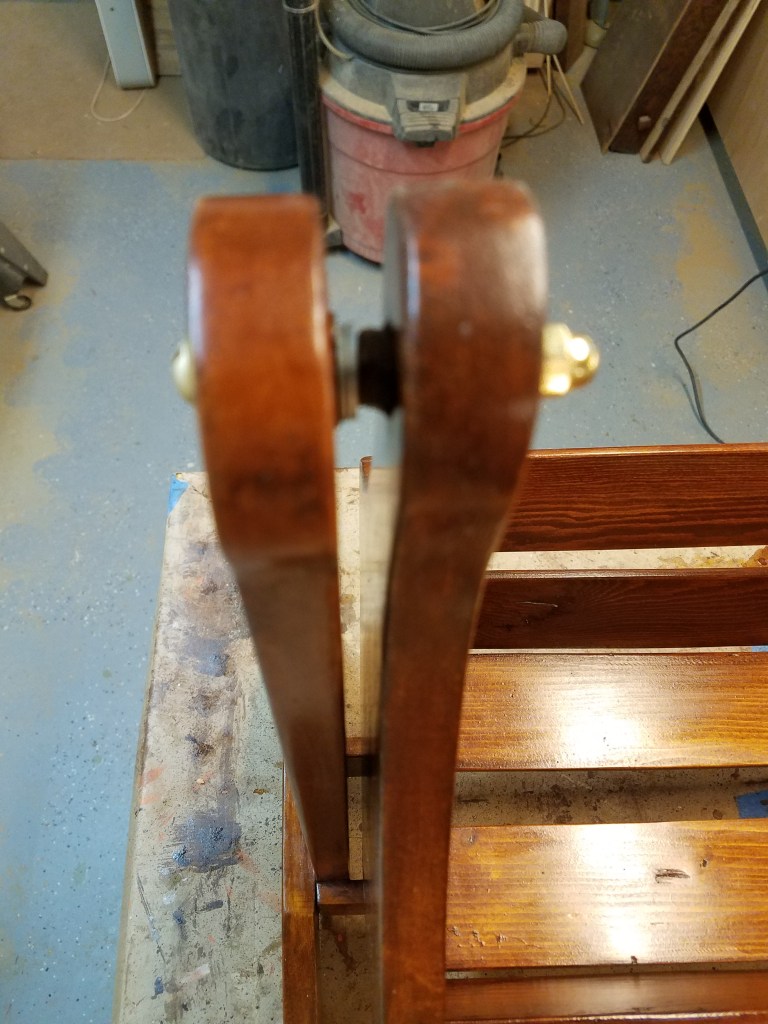
I had to experiment a bit with the pivots. First thing, I needed solid wood where the big crooked holes were, so I drilled them out for some half-inch dowels. Once everything was sanded flat again, I was able to put smaller holes where I wanted them. I tried a few different things for the actual pivots, but I settled on a combination of things that I think will last the longest. On the inside of the mounting frame, I used a tee-nut, and then threaded a long ¼ x 20 brass bolt through it from the opposite side. With the head of the bolt on the outside of the frame and the tee nut on the inside, this made the bolt “rigid” and tight, and took any slop out of the swinging mechanism.
On the cradle part, I used dowels to fill in the worn out holes as I did in the frame, but I wanted to try to keep this from wearing out again. I found that my local Home Depot had a great selection of nylon bushings that were half-inch outside diameter and quarter-inch inside diameter. Absolutely perfect! I used these, not only to fix the holes, but I also let them protrude just a bit to bridge the gap between the cradle and the frame. A finish washer and an acorn nut on the inside of the cradle finished everything off nicely.
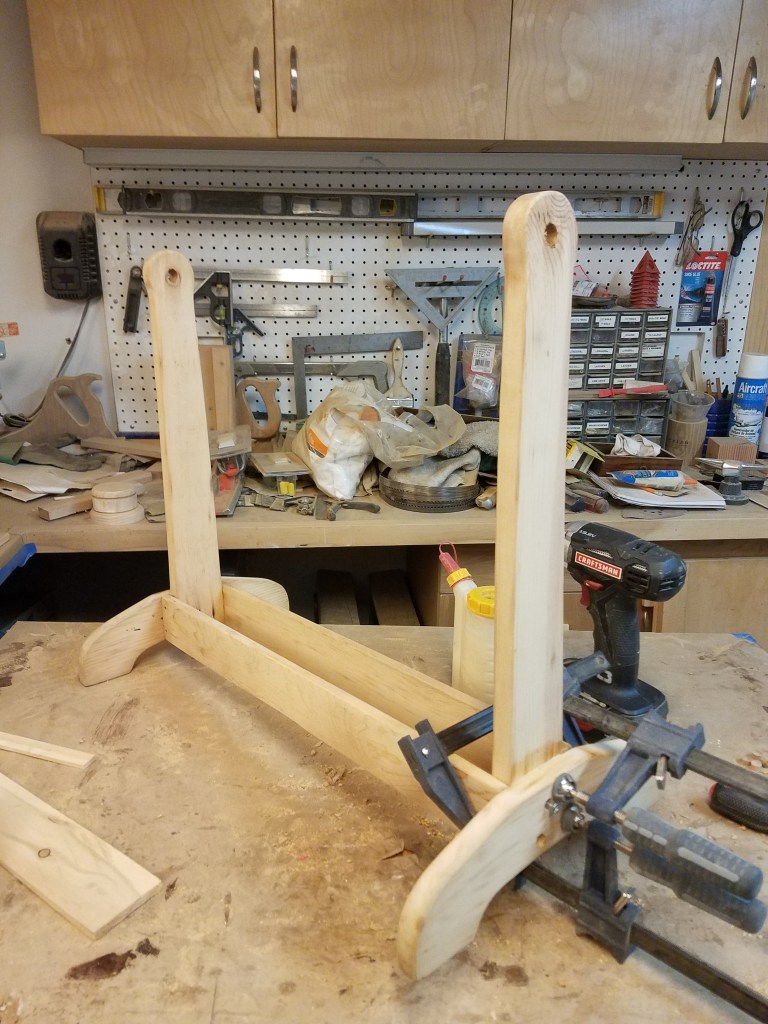
Finally, when it was time to reassemble the cradle itself, I needed a new strategy. The slats had been nailed on, and I didn’t want to use nails. Now granted, those nails held up pretty well for ninety years, so don’t knock them! Still, I wanted something different here. Wood glue would surely hold these slats tightly, if I could figure out a good way to align all the pieces and clamp them at the same time. This would be made tricky by the splayed shape of the cradle, making clamping very awkward.

I decided I’d use dowels to help secure everything, and once finished, this would give the piece a little bit of “old-world charm.” This also gave me an idea. I drilled the slats for the dowels, but not the support piece. At glue up, I used a small screw with a flat washer as my clamp. Once I got the slat in place, I drove the screw through the hole I drilled for the dowel. The screw drew the slat in nicely, and it allowed me to position the piece exactly where I wanted it until the glue dried. This could not have worked out better. When everything was dry, I simply removed the screws, drilled through the same hole into the support, installed the dowels, and sanded everything flush.
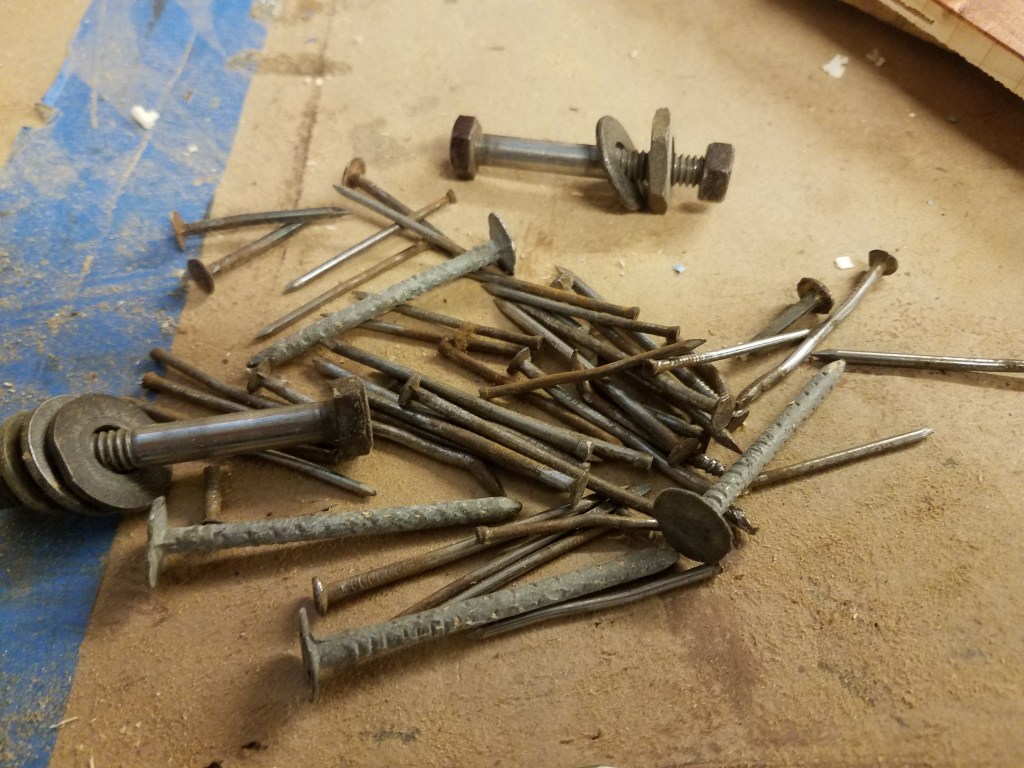
And then on the base unit, there had been several nails driven in an attempt to keep everything together, hold everything tight, and keep the cradle swinging. At some point, longer nails were used, and the tips were bent over on the back side. Let’s just say that, eventually, I got these nails out. But they left their marks on the pieces. Apart from the pivots, this is the only place where mechanical fasteners were used. I countersunk a few holes for screws, placing them somewhat evenly in the places where nails had been driven previously. Some flat plugs and a little sanding, and the screws disappear. Filler would have to suffice for other areas.
General Finishes’ Nutmeg Gel Stain provided the color, and Amber Shellac provided the warmth. So let’s hope this piece will last another hundred years. I’m proud to have helped keep this piece around for future generations. I hope the original craftsman would be happy to see that his work will live on